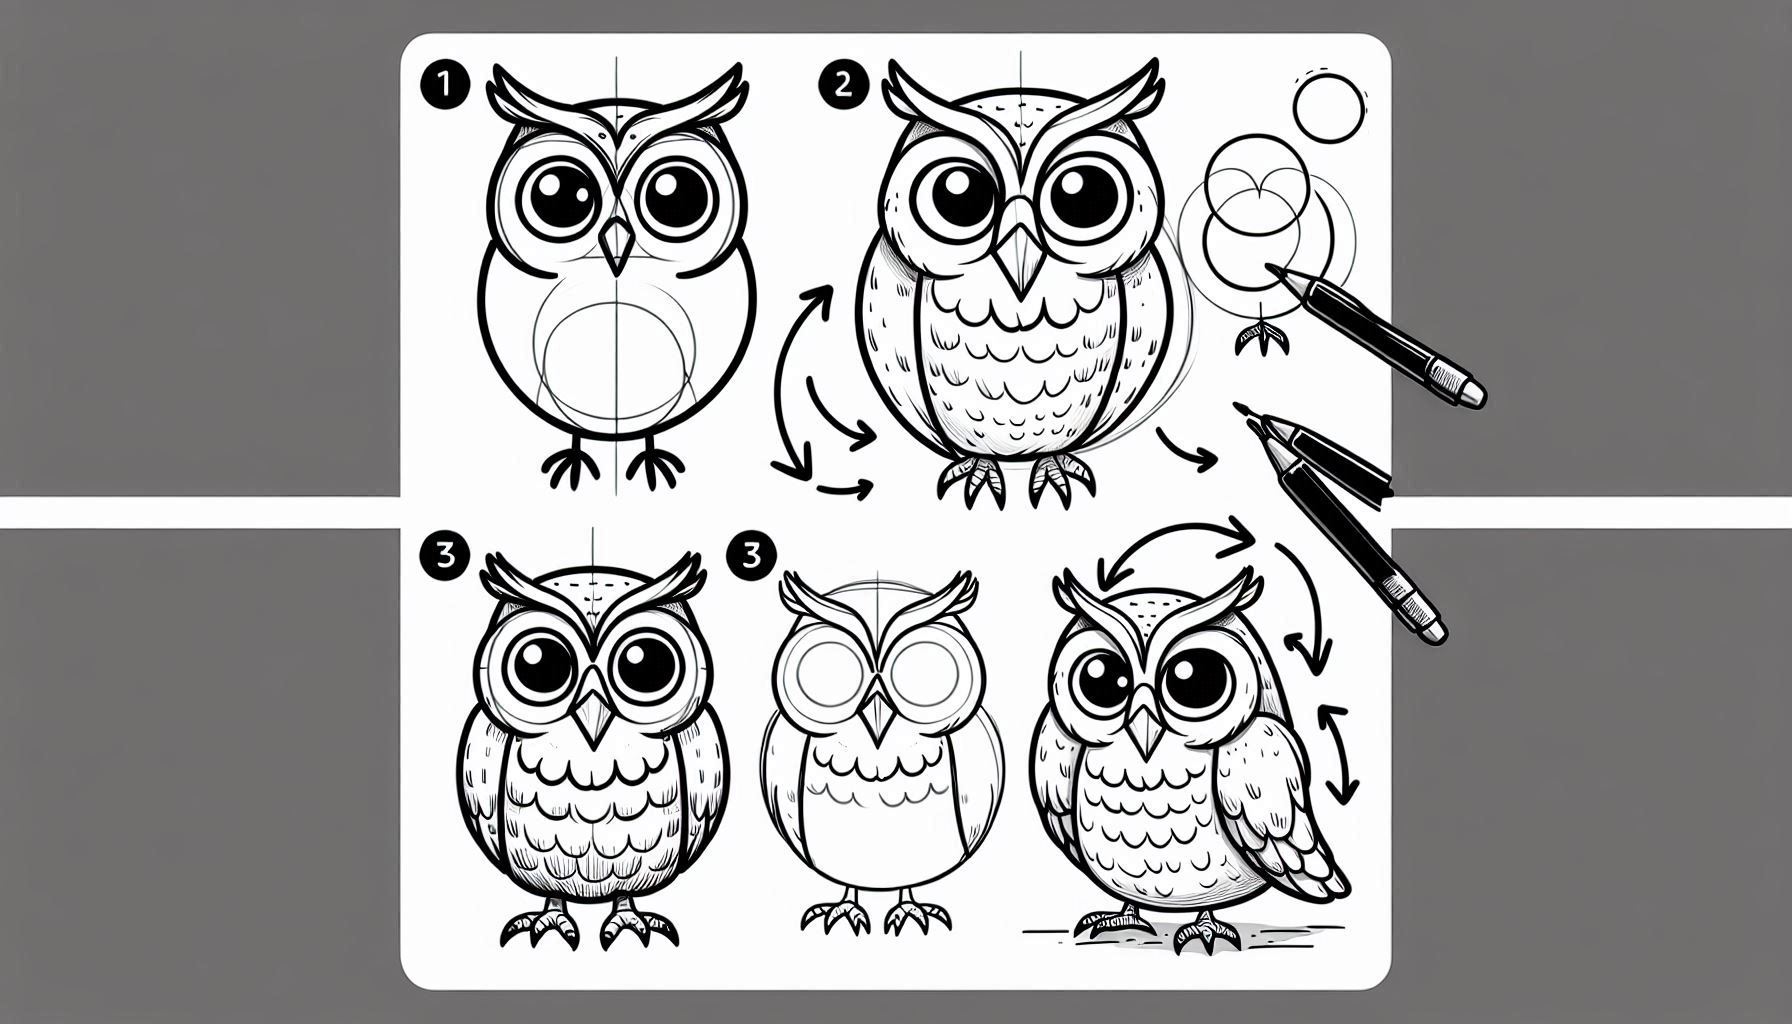
How to draw an owl, Drawing an owl can be a thrilling experience as these fascinating creatures possess distinctive characteristics that make them wise and enigmatic. Owls are wonderful subjects to draw, with their captivating features like large eyes, fluffy feathers, and unique shape. Let’s explore the process of drawing an owl step-by-step and create a delightful masterpiece. Get your pencil ready, and let’s begin!
Table of Contents
The Delight of Illustrating Oversized, Emotive Eyes
Owls are famous for their big, round eyes that give them a wise and curious appearance. Creating these vibrant eyes is an enjoyable method to capture the owl’s unique personality and add vitality to your artwork.
The Joy of Adding Fluffy Feathers
Owls possess soft, fluffy feathers that lend them a snug and captivating look. Incorporating feather details into your drawing can enhance the realism of the owl and introduce texture to your artwork.
The Joy of Capturing the Distinct Form
Owls possess a unique physique characterized by a rounded body and a flat face. By capturing this distinct shape, you can create a more precise and easily identifiable owl drawing.
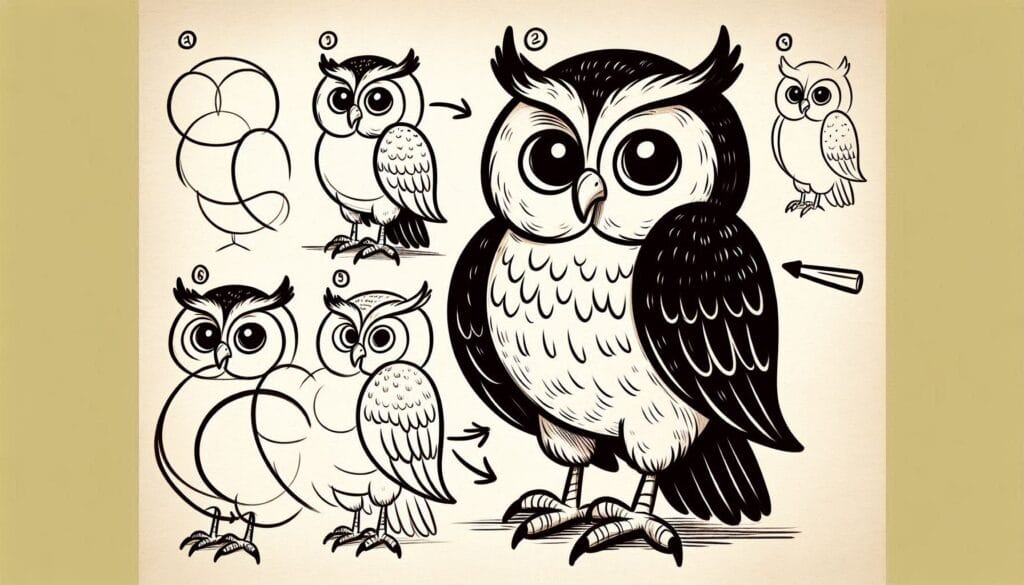
Steps: How to Draw an Owl
Step 1:
First, begin by sketching the owl’s head. Create a sizable, curved form for the head. Place two large, round eyes near the top of the head. Draw a smaller circle for the pupils inside each eye.
Step 2:
Now, let’s attach the beak. Create a small, triangular shape in the center of the head, just below the eyes. This is the beak of the owl.
Step 3:
Sketch the body. Draw two curved lines below the head to create the body of the owl. The body has a round shape and is slightly wider towards the bottom.
Step 4:
Draw the wings. Sketch two curved forms that stretch out from both sides of the figure. The wings should have a wide and gently curved shape. Include some curved lines in the wings to depict the feathers.
Step 5:
Attach the legs and talons. Sketch two compact legs that extend from the lower part of the body. Attach small, curved talons to the tips of each leg.
Step 6:
Illustrate the feathers. Include feather details on the body, wings, and head. Utilize small, curved lines to achieve a layered effect, while also incorporating varying line lengths to introduce texture.
Step 7:
Enhance your drawing by outlining it with a darker pencil or pen, which will make the lines more prominent. Remove any extra guide lines and perfect the details to give your owl a neat and polished appearance.
Step 8:
Add some color to your owl! Choose for earthy tones like brown, gray, or white when selecting colors for the body and feathers. You can incorporate some deeper hues for the eyes and beak. Enhance the feathers with lighter shades to add depth and dimension.
Theme 1: Exploring the Delight of Creating Bold, Expressive Eyes through Drawing
Woohoo! Let’s discuss the delight of creating artwork with large, expressive eyes! Owls have large, circular eyes that give them a wise and inquisitive appearance. By directing your attention to the owl’s eyes, you can truly capture its distinct personality and breathe life into your drawing. It’s fascinating to witness how these eyes give the owl such a captivating and animated appearance!
Theme 2: The Joy of Adding Soft Feathers
Hello there! Let’s dive into the joy of incorporating soft feathers! Owls possess soft, textured feathers that give them a cozy and intriguing appearance. By incorporating these delicate feather details, your drawing will exude a sense of realism and enchantment. It’s all about creating a stunning texture that brings your owl to life!
Theme 3: Embracing the Joy of Capturing the Distinctive Form
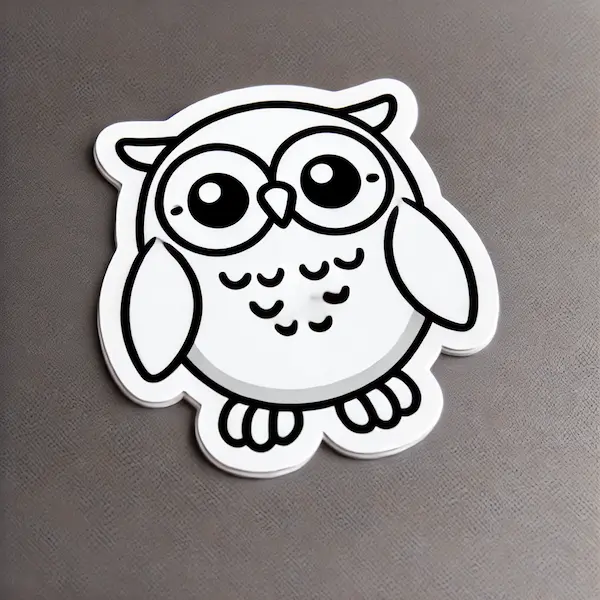
Let’s explore the joy of capturing the distinct form of the owl! Owls possess a unique rounded body and flat face, which grants them immediate recognition. By directing your attention to this form, you can produce a more precise and enjoyable illustration. It’s an enjoyable way to highlight the owl’s distinctive and charming characteristics!
Conclusion
Creating an owl illustration can be an enjoyable activity that allows you to hone your skills in depicting prominent eyes, soft feathers, and distinct forms. By following these steps and adding your own creative touches, you’ll create a wonderful drawing of an owl. Keep in mind that with practice, your drawing skills will improve and you’ll become more adept at creating delightful creatures. So grab your pencil, enjoy yourself, and create an owl that’s wise and playful!
For a fun and simple guide on how to draw an eagle, you can find easy-to-follow instructions here. This fun tutorial offers easy-to-follow instructions, allowing young creators to dive into their imagination while discovering these magnificent birds!

