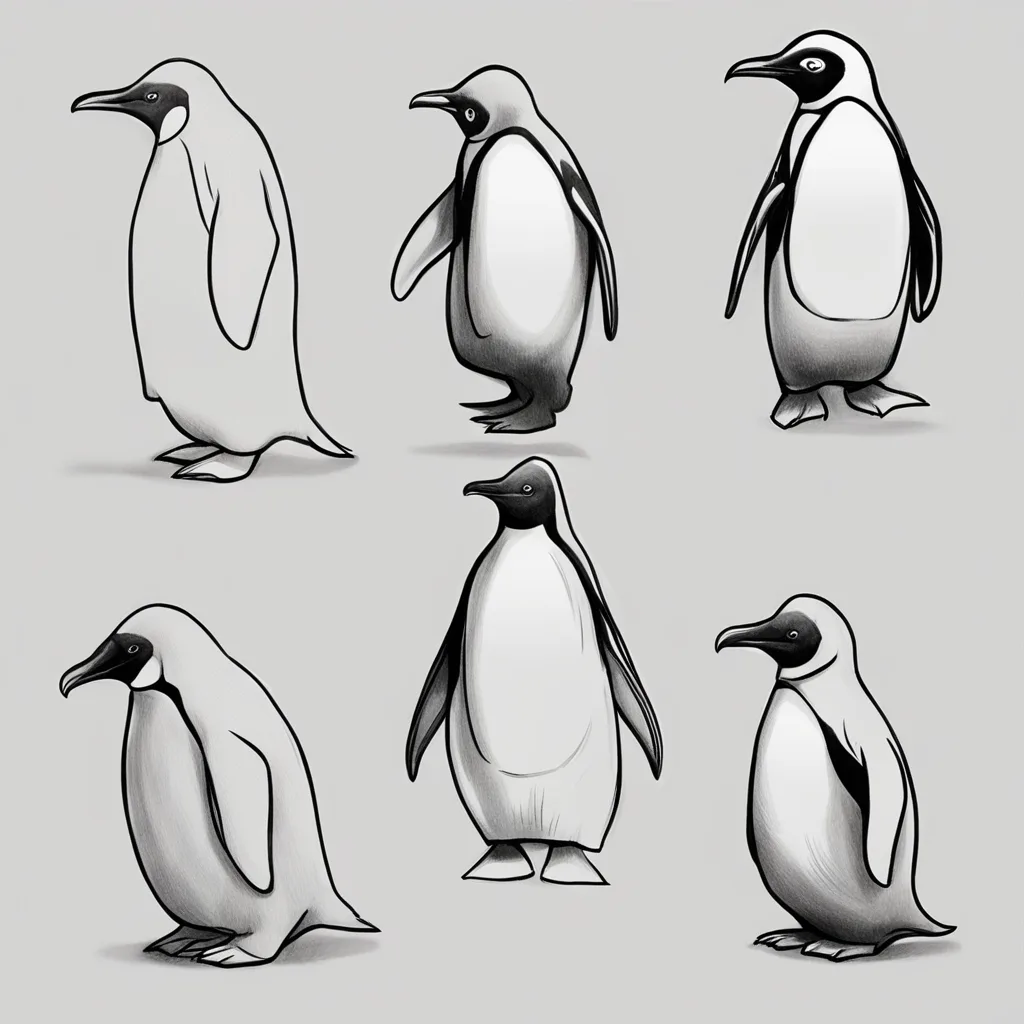
Creating a penguin illustration is a delightful method to capture the playful and distinctive nature of these lovable creatures. Penguins are a popular choice among artists due to their unique black and white coloration, adorable waddling walk, and friendly nature. In this guide, we’ll take you through the process of drawing a penguin, paying close attention to its distinctive characteristics and helping you create an adorable and captivating illustration. Let’s take off on this imaginative journey!
Table of Contents
Themes to follow
The Fascinating Characteristics of Penguins
Penguins have a distinctive tuxedo-like appearance, thanks to their black and white feathers. Their unique physical characteristics include an upright posture, short legs, and wings that resemble flippers. By familiarizing yourself with these features, you can create a depiction of a penguin that is both accurate and captivating.
The Joy of Documenting Penguin Traits
Exploring the unique traits of a penguin, like its adorable waddling gait and striking color patterns, can be an enjoyable endeavor. Exploring the graceful forms and capturing the interplay of light and dark in their plumage can help you develop your artistic abilities in color and texture.
Discovering the Fascinating World of Penguins Through Art
Penguins are captivating creatures with extraordinary adaptations for surviving in frigid environments. Illustrating them provides an opportunity to delve into their physical characteristics and behaviors, as well as their significance within different ecosystems. This theme highlights the educational aspect of art and the chance to expand knowledge about penguins through creative expression.
Steps: Drawing a Penguin
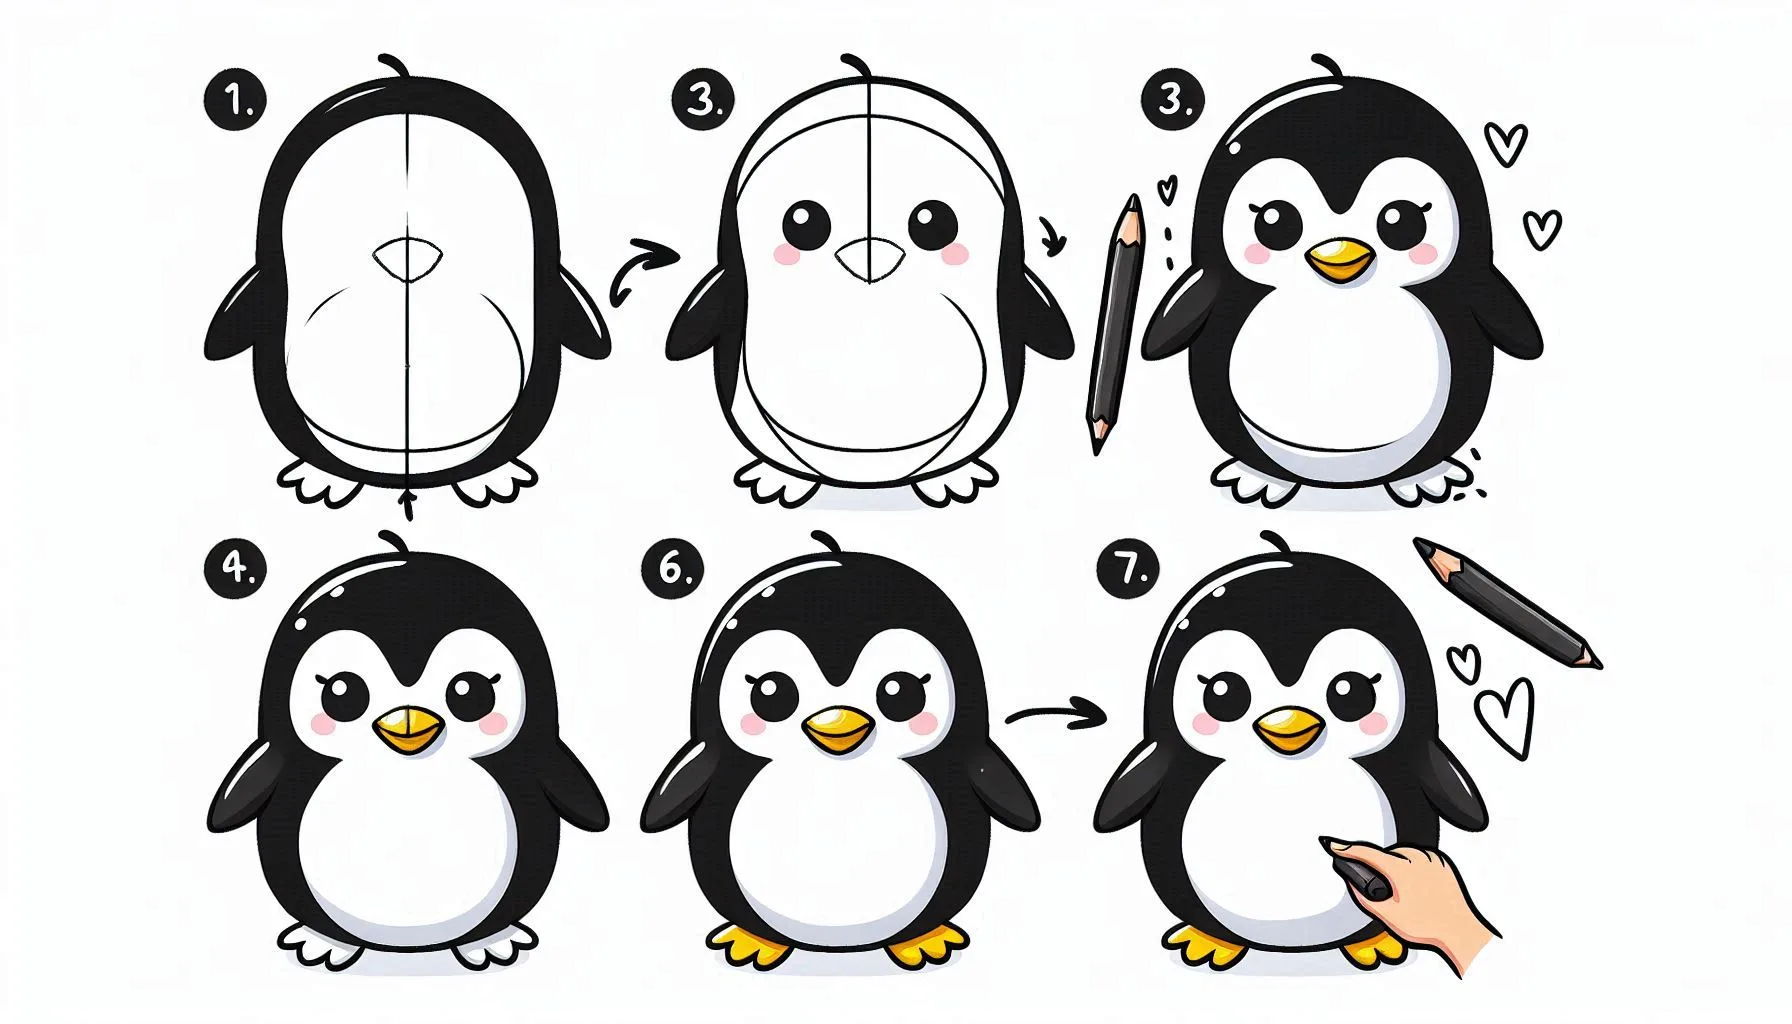
Step 1: Basic Shapes Drawing
Begin by sketching the fundamental outline of the penguin’s body. Start with a sizable oval shape for the primary body. Penguins have a rounded, slightly elongated body, so it’s important to ensure that the shape accurately represents this. Create a smaller, slightly rounded shape on top for the head.
Step 2: Add head and beak
Place the head at the uppermost part of the body. Penguins have a rounded head with a small, slightly hooked beak. Make the beak a petite, triangular shape that extends from the front of the head. Place two small, circular eyes on each side of the head. Penguins have expressive eyes, so it would be nice to make them slightly larger and more detailed.
Step 3: Drawing the flippers
Penguins have wings that are specially adapted for swimming. Illustrate the flippers extending gracefully from the sides of the body. Begin by drawing a gently curved line at the top of the flipper, then add another curved line below to create the desired shape. The flippers should have a rounded shape that gradually tapers to a point.
Step 4: Drawing the legs and feet
Penguins possess short, stubby legs and webbed feet. Extend the legs downward from the bottom of the body. The legs should be shorter and have a gentle curve. Complete the illustration by drawing two webbed shapes at the end of the legs. The feet of penguins have a gentle curve and are equipped with three toes that are connected by webbing.
Step 5: Incorporate the abdomen and torso
Penguins have a unique black and white coloration. Create a gently curving line that divides the upper portion of the body from the lower, giving a distinction between the black and white areas. This line should flow gracefully along the contours of the body, establishing a distinct separation between the contrasting black and white regions.
Step 6: Enhance the Look with Texture and Fine Details
To enhance the texture and add intricate details, incorporate short, curved lines along the body and flippers, creating a feather-like appearance. Penguins have a smooth texture, so it’s best to use gentle, short strokes to show the feather pattern. Be sure to focus on the areas around the beak and feet, adding intricate details to give the penguin a more realistic appearance.
Step 7: Perfecting the Form
Consider using a darker writing utensil to carefully trace over your initial drawing and enhance the penguin’s form. Refine the contours of the body, head, flippers, and legs. Make sure the body segments, flippers, and feet are clearly defined and in the right proportions. Remove any unnecessary guidelines or overlapping lines to tidy up your drawing.
Step 8: Enhance with vibrant hues and subtle shadows
Elevate your drawing by incorporating vibrant hues to highlight the penguin’s contrasting black and white feathers. Opt for a darker shade for the upper portion of the body, while choosing a lighter hue for the belly and chest. Enhance the artwork by incorporating shading to bring out the intricate details of the feathers. Opt for lighter shades to enhance highlights and darker hues to add depth and dimension, resulting in a realistic and lifelike effect.
Conclusion
Drawing a penguin is a fun and captivating experience that lets you capture the adorable features and unique appearance of these beloved creatures. By following the steps in this guide and paying close attention to their anatomy, colors, and details, you can create a captivating and realistic penguin drawing. Embrace the joy of creating and let your imagination soar as you bring this cute creature to life on paper!


Check out this super fun and simple guide to learn how to draw a sparrow with easy step-by-step instructions! This fun tutorial provides easy-to-follow instructions, allowing young creators to dive into their imagination while discovering these delightful little birds!


