Peas are a fun and familiar vegetable, with their cute round shape and the pod that keeps them snug inside. Drawing peas is a fantastic activity for little ones to practice basic shapes and enhance their creative abilities. Whether it’s for a fun project or just some creative playtime, discovering how to draw peas can be both enjoyable and a great way to learn. This fun guide will help little creators easily draw peas while inspiring them to play with colors and shapes.
Table of Contents
Supplies Utilized
Before you begin your fun drawing adventure, gather all the cool supplies you’ll need:
Art supplies: Any type of drawing paper or sketchbook.
Pencil: A simple HB pencil perfect for doodling and drawing fun pictures.
Magic tool: To fix any oopsies or make your artwork even better.
Green Colored Pencils or Crayons: Various shades of green to bring the peas and their pod to life.
Black Marker (optional): To outline the drawing for a clearer and bolder appearance.
Ideas for Pea Artwork
Pea drawings can be included in a variety of exciting and imaginative themes for young ones to discover:
Pea Pods in the Garden: Create a colorful picture of peas sprouting in a garden, nestled among a variety of other vibrant vegetables and plants.
Pea Pod on a Plate: Draw a delightful scene featuring peas on a plate alongside colorful veggies, ideal for a cheerful kitchen atmosphere.
Peas with Silly Expressions: Bring your peas to life by sketching adorable or goofy faces on them, creating a whimsical, animated vibe.
Peas and Nature: Include a butterfly or ladybug next to the pea pod, adding a touch of the outdoors and making the drawing more lively.
Step-by-Step Instructions on How to Draw Peas
Let’s jump right in with a fun, simple guide to drawing peas in a pod!

Step 1: Create the Pod Shape
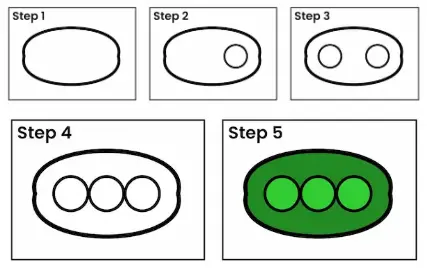
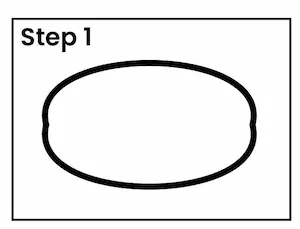
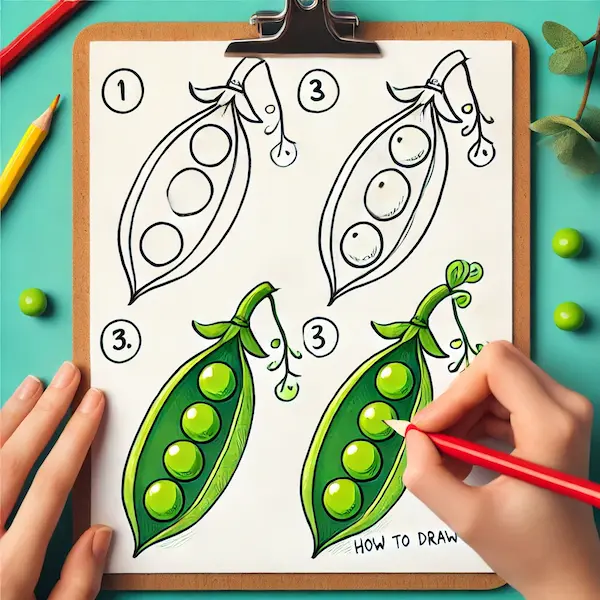
Begin by sketching a long, gently curved oval shape. This shape will create the pod for the little peas. Ensure that the ends of the oval are a bit pointed, just like how pea pods have a narrow tip on each side.

Step 2: Build the Fun Pod
Inside the oval, create a line at the top of the pod to show where it opens up. This line should follow the curve of the oval and be drawn close to the edge, showing that the pod is a little bit open to reveal the peas inside.

Step 3: Illustrate the Little Green Gems Nestled Within the Shell
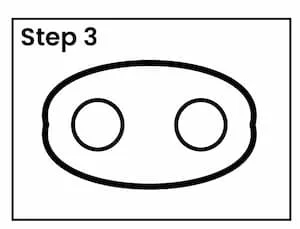
Alright, let’s sprinkle in those little green gems! Inside the pod, create a fun line of tiny, round dots all in a row. These circles will show the little green gems nestled within the pod. Make sure to arrange them with equal spacing and ensure they are all uniform in size. Typically, you can find around 4-6 peas in a regular pod, but you can totally adjust the number based on how big you want your drawing to be!

Step 4: Sprinkle in Some Fun Details
To make the pea pod look even more lifelike, draw a line along the bottom edge of the pod. This line shows where the pod naturally comes together. You can also add gentle curves to the top opening of the pod to create a more playful appearance.

Step 5: Create the Stem
At one of the fun ends of the pod, draw a little, wiggly stem. The stem is the part that links the pod to the pea plant. Make the stem slender and gently bent for a more lifelike look.

Step 6: Sprinkle on Some Leaves (If You Want)
If you want to add some fun details, you could sketch a few tiny leaves popping out from the stem! The leaves ought to be easy and rounded, perfectly matching the pea pod. Feel free to add one or two leaves, based on how much room you have available!
Step 7: Add Some Color to Your Peas
Now it’s time to add some fun colors to your masterpiece! Try using various shades of green to give your peas and pod a lively and authentic appearance. You can use a deep green for the outer shell and a bright green for the little peas inside. If you want to make it more fun, use a slightly darker shade of green under the peas to add some cool depth!
Step 8: Include Fun Background Elements (Optional)
If you want to make your drawing even more fun, try adding some cool background stuff like a garden, different veggies, or maybe some little bugs! Consider adding a plate or a garden trellis to show where the pea pod is growing, making the scene even more lively and fun!
Find Your Spark
Here are some ideas to spark creativity in their pea drawings:
Garden Visits: Exploring a garden or farm can provide young ones with direct inspiration for sketching peas. Watching how peas develop and their appearance in the real world is great for understanding both color and shape.
Cookbooks: Browsing through cookbooks that highlight peas in their recipes can spark creativity, encouraging little ones to illustrate peas in a fun culinary scene, maybe on a plate or alongside other colorful veggies.
Animated shows often showcase lively and colorful vegetables. These can spark creativity for illustrating peas with silly faces or in a more whimsical, exaggerated manner.
Nature Walks: A stroll outdoors can help little ones connect with the environment, sparking their imagination on how to weave peas into a bigger picture, like a garden or a field.

FAQs: How to Create Peas
Is drawing peas tricky?
Absolutely, drawing peas is a breeze! Their round shape and the simple structure of the pod make them a fantastic subject for newcomers, particularly for young learners exploring basic drawing techniques.
What colors are best for illustrating peas?
Peas are usually green, but little ones can use various shades of green to add depth and realism. For a fun and imaginative drawing, they can try using bright colors like yellow or blue to create a whimsical effect.
What are some fun ways to make my pea drawing look more lifelike?
To make the drawing more fun, think about adding some cool shading and texture! Try using deeper greens for the shadows and brighter greens for the highlights on the peas and pod. Including features such as the seam of the pod enhances the sense of authenticity.
Is it possible for me to draw multiple pea pods?
Absolutely! Sketching several pea pods can make for a livelier and more captivating scene. Feel free to place them next to each other or in various spots to add excitement to your artwork!
What if my drawing isn’t just right?
Have fun and enjoy the process! Art is a fun adventure where imagination runs wild and the journey is just as exciting as the end result. Errors can sometimes spark exciting, creative thoughts! Feel free to start over whenever you want, or celebrate the special charm of your creation.
Case Study: Fun Pea Drawing Activity
A local after-school program organized a drawing workshop where young artists learned how to draw vegetables, including peas. The instructor provided simple step-by-step instructions, and the little ones were encouraged to experiment with different colors and details.
Result: Enhanced Creativity: The little ones added their own twists to the drawing, such as funny faces on the peas or additional background elements like flowers or insects.
Engaged Learning: The workshop helped young ones discover various vegetables while also boosting their creative abilities.
Collaborative Fun: They worked together, sharing ideas and giving each other tips on how to improve their drawings.
Conclusion
Drawing peas is a delightful and simple activity, encouraging young ones to discover basic shapes and coloring techniques while making something recognizable and engaging. The delightful round peas nestled within the curved pod offer a fantastic opportunity for little creators to hone their skills. This fun and simple guide lays out the process in a way that’s easy to understand, making it enjoyable for little ones as they pick up new skills along the way. Get your crayons and sketchbooks ready, and let’s have fun creating some vibrant pea pods!


