The iris is a beautiful flower, recognized for its tall, graceful petals and bright colors. With its delicate structure and flowing shapes, it’s a fantastic subject for young artists to learn how to draw. This guide offers a fun and straightforward way to draw an iris, encouraging little artists to unleash their imagination while discovering the beauty of this lovely flower. Whether for enjoyment or a school assignment, sketching an iris will assist young ones in enhancing their creative abilities and admiration for the natural world.
Table of Contents
Items Utilized
To start creating an iris, collect these fun supplies:
- Art supplies: Any drawing paper or a sketchbook.
- Pencil: A regular HB pencil perfect for drawing and doodling.
- Rubber: Perfect for fixing little mistakes and polishing up the artwork.
- Bright Pencils/Crayons: Fun colors like purple, blue, yellow, and green for the flower and leaves.
- Black Marker (optional): To trace around the picture and make it stand out.
Ideas for Iris Artwork
Little ones can dive into various imaginative themes while sketching irises, making the experience enjoyable:
- Imagine a vibrant scene filled with colorful blooms, where irises stand tall among a variety of cheerful wildflowers, showcasing their beautiful home in nature.
- A beautiful iris in a stylish vase: Capture the charm of a tall, graceful flower in a lovely container, showcasing its impact on interior design.
- Iris and Insects: Add colorful butterflies or buzzing bees fluttering around the flower to highlight the delightful bond between flowers and the natural world.
- Fantasy Iris: Inspire young minds to unleash their creativity by designing a whimsical iris featuring extraordinary colors or patterns.
Step-by-Step Instructions on How to Draw an Iris
Check out these fun steps to create a lovely iris flower!

Step 1: Create the Heart of the Flower
Begin by sketching a tiny, oval form close to the upper part of your paper. This shape will show the bottom part of the iris’s petals. The iris flower is unique because it doesn’t have a distinct center like many other flowers, making it a fun starting point for the petals.

Step 2: Add the Fun Inner Petals
From the center oval, create three big, curved petals that will shape the inner part of the iris. These petals ought to be a bit stretched and spread outwards. The petals of an iris can look like they’re playfully curling, so ensure they have a gentle, wavy shape.

Step 3: Add the Fun Outer Petals
Now, add three bigger petals that point downwards to create the outer part of the flower. These petals could be a bit longer and hang down a little, giving a fun layered look. The outer petals usually feature more noticeable curves, creating a graceful, flowing appearance for the iris.

Step 4: Create the Stem
Under the flower, make a long, straight line for the stem. The stem of an iris is long and slender, so be sure it’s high enough to hold up the big flower at the top.

Step 5: Add Fun Foliage
Sketch elongated, slender leaves flanking the stem. The leaves of the iris stand tall and straight, resembling blades that reach up from the ground. Feel free to sketch a couple of leaves, with some overlapping the stem to make your drawing more fun and engaging!

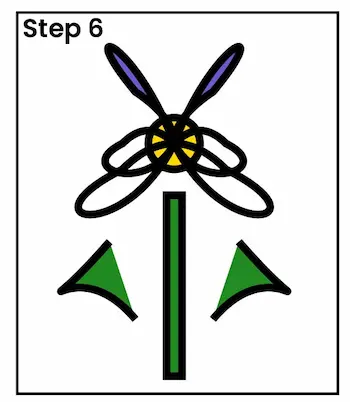
Step 6: Add Fun Details to the Petals
To make the petals more interesting, draw thin lines that follow their curves, highlighting their veined structure. Try adding a little soft shading to the petals to make them pop, particularly around the center where they come together.
Step 7: Add Some Color to Your Iris
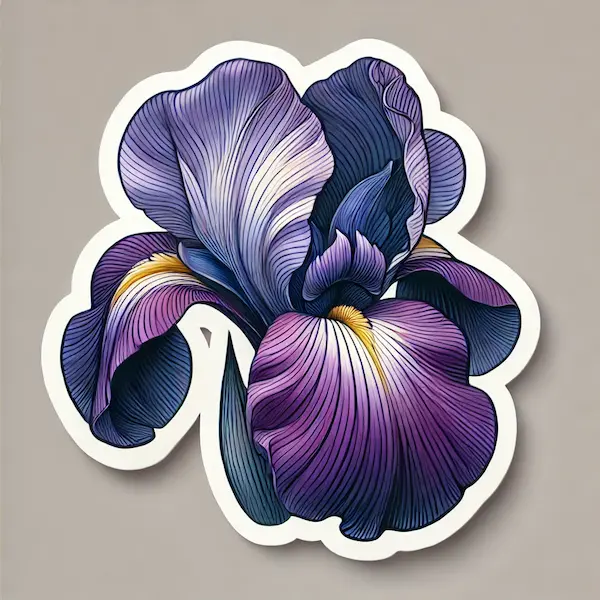
Now it’s time to make your drawing burst with color! Flowers can be so much fun with their bright colors! Think about using shades of purple, blue, or yellow for the petals. Mix darker and lighter colors to create dimension and showcase the gentle beauty of the petals. For the stems and leaves, use various shades of green to make them look lifelike.
Step 8: Include Fun Background Features (Optional)
To make your drawing more exciting, think about including fun background elements like a colorful garden, a bright sky, or other cheerful flowers. Some extra touches can really bring your iris to life in a fun way.
Find Your Spark
Here are some ways young artists can find inspiration for their iris drawings:
- Botanical Gardens: Exploring a garden filled with irises can offer wonderful inspiration for vibrant colors, unique shapes, and the overall design of the flower.
- Art Books: Numerous art books designed for young artists provide step-by-step guides for drawing flowers, inspiring new ideas for iris creations.
- Exploring pictures of actual irises on the internet can spark creativity with their dimensions, color designs, and petal forms.
- Nature Walks: Spotting beautiful irises in the great outdoors or even in your own backyard is a fantastic way to inspire drawing and coloring activities.
FAQs: How to Create a Beautiful Iris Drawing
Is drawing an iris challenging?
Even though an iris might look intricate, simplifying it into basic shapes makes it a lot more fun to draw. Little ones can follow this guide step-by-step, starting with the basic shapes and adding details along the way.
Which colors would be best for my iris drawing?
Irises usually bloom in vibrant shades like purple, blue, yellow, and white. Encourage young ones to experiment with these colors or even create their own unique color combinations.
What are some tips to enhance the realism of my iris drawing?
To make the drawing more fun, think about adding some cool shading and texture to the petals! Adding thin lines to show the veins in the petals can make the drawing look more interesting and lively.
Is it okay to add more flowers to my drawing?
Absolutely! Irises are so pretty when they’re paired with other blooms like tulips or lilies! Mixing various blooms in a single illustration can bring to life a lively, colorful garden setting.
What if my drawing doesn’t look just right?
Encourage young ones to relish the journey of making art instead of concentrating on achieving perfection. Every drawing is special, and little mistakes can spark fun new ideas!
Case Study: Creative Drawing Class
In a lively art class, a teacher set up a fun drawing activity where young learners were guided on how to create an iris. The session kicked off with a fun little intro about the flower, and then we jumped right into the drawing instructions! The little ones were encouraged to experiment with colors and make their iris drawings as unique as possible.
Result:
Creative Growth: The little ones had a blast using vibrant colors and playing with shapes, crafting their own unique versions of the iris flower.
Confidence Building: The step-by-step guidance allowed young artists to feel more confident in their drawing abilities.
Unique Creations: Every piece of art was distinct, showcasing the special imagination and flair of each little artist.
Conclusion
Creating an iris is an enjoyable and fulfilling activity for young ones. The iris, with its beautiful petals and bright colors, is a fantastic way to dive into fun artistic techniques and spark imagination. This guide provides a simple method that enables young ones to deconstruct the flower into manageable steps, boosting their confidence in drawing skills. Gather your supplies, unleash your imagination, and have fun creating a lovely iris!


