How to draw a snowman is an adored symbol of the winter season, bringing back memories of happiness, warmth, and festive spirit. Creating a snowman is a wonderful and imaginative way to fully embrace the winter season, regardless of whether you have artistic aspirations or are simply seeking an enjoyable creative endeavour. In this step-by-step guide, we will explore the delightful process of drawing a snowman that’s sure to bring a smile to your face.
Table of Contents
Supplies You Will Need
Before we get started, make sure you have all your materials ready:
- Choosing between drawing paper or a sketchbook
- Pencils (H, HB, and 2B for shading)
- Eraser
- Coloured pencils or markers (if desired)
- Reference images of snowmen (optional but helpful)
Step 1: Draw the Snowman’s Body
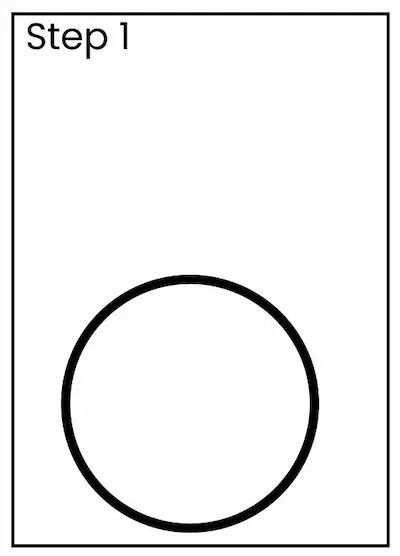
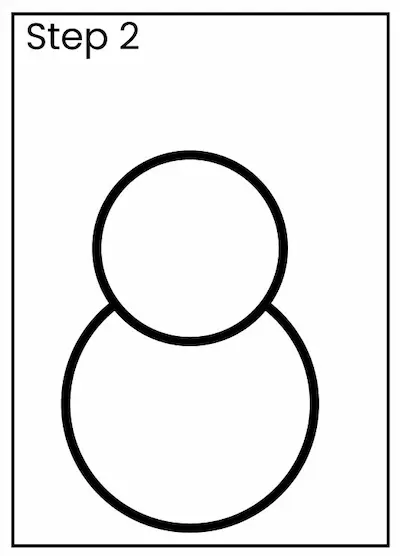
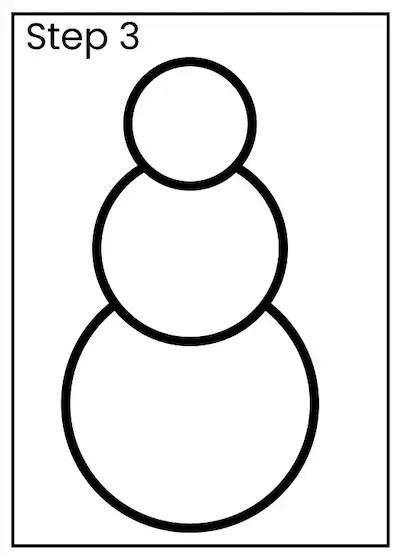
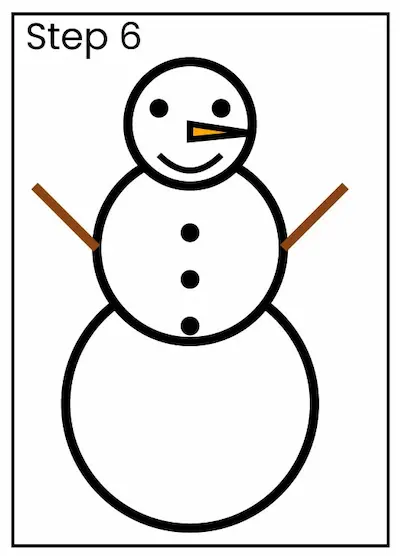
Start by drawing three circles, one on top of the other, to create the snowman’s body. The size of the circles should be arranged in a descending order, with the largest one at the bottom, a medium-sized one in the middle, and a smaller one for the head. These circles represent the base, torso, and head of the snowman.
Step 2: Add the Snowman’s Face
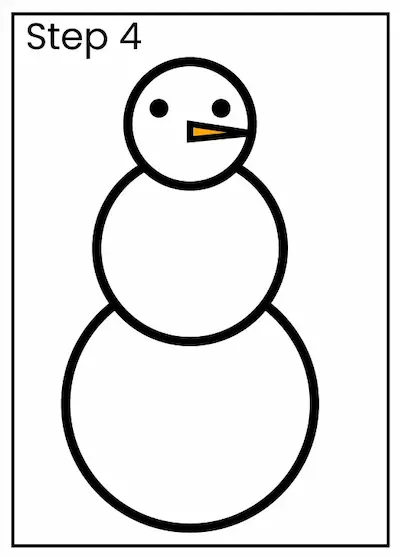
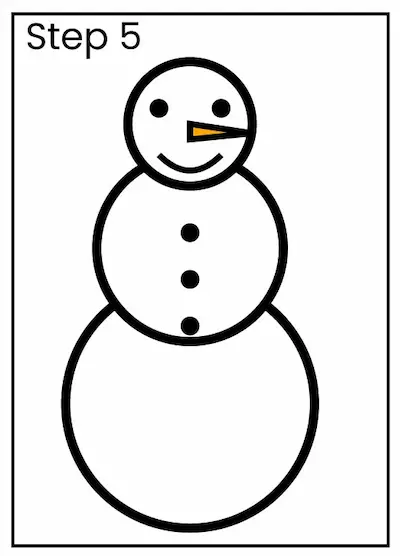
Draw the face of the snowman in the top circle. Place two small circular eyes and a carrot-shaped nose. A happy grin will give your snowman a warm and welcoming expression. Personalise the face to your preference, and remember to include coal buttons along the middle circle to depict the snowman’s “body.”
Step 3: Make the Snowman’s Arms
Add two curved sticks on either side of the middle circle to serve as the snowman’s arms. You have the option to create a straight or slightly curved appearance, which can give a more authentic look.
Step 4: Add a Hat and Scarf (Optional)
To add a touch of winter charm to your snowman, consider incorporating a top hat and a scarf. Create a tall, cylindrical hat on the snowman’s head and add a few lines to represent the brim. Dress up the snowman by gently placing a scarf around its neck, letting the ends hang gracefully in front.
Step 5: Create a snowy ground
Extend the bottom of the largest circle to create a stable base for your snowman to stand on. You can incorporate some curves and wavy lines to depict the uneven snow-covered terrain. Adding snowdrifts or a snowy landscape can further enhance the winter scene.
Step 6: Enhance and Add Depth
Use your pencils to add shading and texture to the snowman. Add a touch of gentle shading to give the snowman’s body a more lifelike, three-dimensional look. Adding subtle texture to the snowman’s body can enhance its appearance and make it resemble real snow. Using gentle, delicate strokes can help you achieve this desired effect.
Step 7: Putting on the Finishing Details
Take a moment to carefully assess your drawing, making any needed tweaks and removing any superfluous lines. If you’d like to add some vibrant hues, you have the option of using coloured pencils or markers to infuse your snowman with a burst of color. Traditional snowmen are typically white, but don’t be afraid to let your imagination run wild with different colors.
Tips for Achieving Your Goals
- Practise: Creating a snowman is a fantastic opportunity to hone your skills in basic shapes and proportions. It’s completely normal if your initial try doesn’t result in perfection. Keep going!
- Utilise References: Utilising reference images can be beneficial for gaining a better understanding of the different techniques used to create faces, hats, scarves, and other intricate details.
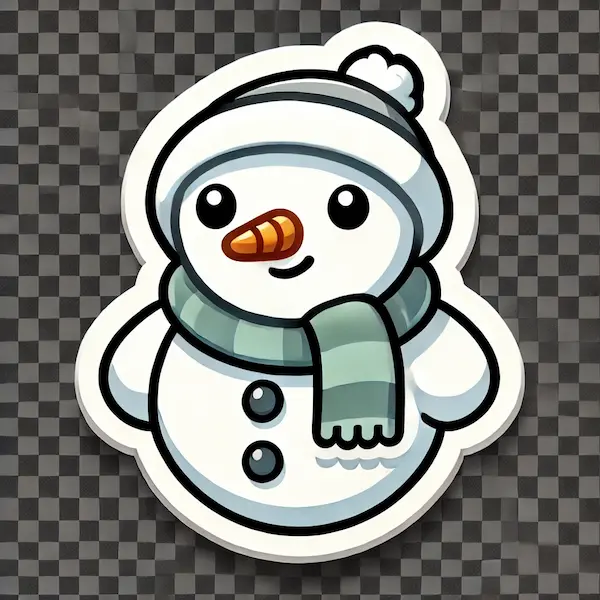
- Let your imagination run wild: Although we’ve provided instructions for a traditional snowman, feel free to unleash your creativity and add your own special flair to your artwork. Try out various accessories, poses, or facial expressions.
- Embrace Imperfections: Snowmen are often not perfectly symmetrical, and that’s what makes them so charming. Embrace the unique and charming aspects of your drawing.
FAQ (Frequently Asked Question)
I have just started exploring the world of drawing. Is building a snowman a good place to start?
Definitely! Creating a snowman is a project that is perfect for beginners. It gives you the opportunity to work on your skills with shapes, proportions, and shading. It’s an enjoyable and attainable drawing challenge for artists of any skill level.
Is it necessary to use a reference image when drawing a snowman?
When it comes to drawing a snowman, using a reference image can be quite helpful, especially if you’re just starting out. It can give you a better understanding of snowman proportions, facial features, and all the little details. It can also spark your imagination.
Is it okay to add some creative accessories to my snowman, or should I stick to the traditional ones?
Feel free to let your imagination run wild when building your snowman! Feel free to add some fun and playful accessories, such as sunglasses, a pipe, or even a costume with a winter theme. Feel free to get creative with your snowman, whether you prefer a classic look or something more unique.
How can I give my snowman a more lifelike appearance and enhance its wintry charm?
Enhancing the snowman’s body and the snowy ground with subtle shading can bring a sense of depth to your artwork. To give the snowman a more wintry appearance, try using gentle, delicate strokes to add texture to its body.
Is it possible to create a snowman using various artistic styles, such as cartoon or realistic?
Definitely! There are different styles to draw snowmen, ranging from realistic and detailed to simple and cartoonish. Customize your drawing style to suit your artistic preferences.
How can I make the snowman’s accessories, such as the top hat and scarf, appear more lifelike?
When it comes to accessories, it’s important to focus on the little things like shading, texture, and the way the fabric drapes. For instance, the top hat could feature some eye-catching highlights on the brim and subtle shading on the sides. The scarf can have creases and shading to give it a more realistic look.
What are some common mistakes to avoid when drawing a snowman?
It’s important to avoid making mistakes when drawing a snowman, such as having features that are not proportionate to each other. For example, the head should be neither too large nor too small compared to the body. Furthermore, be mindful of any irregularities in symmetry and balance, and avoid using overly intricate accessories that could divert attention from the overall composition.
Are there any alternative materials I can use to colour my snowman, such as watercolours or pastels?
Of course! There are a variety of colouring materials available to bring some vibrant hues to your snowman. Coloured pencils, markers, watercolours, or pastels can all be used to add a pop of colour. Select the medium that best matches your artistic style and desired outcome.
What is the typical time required to create a snowman?
The duration required to create a snowman drawing can differ based on your skill level, the amount of intricacy you desire, and if you plan to add colour to your artwork. Typically, creating a basic snowman drawing can be done in about 20-30 minutes. However, if you want to add more intricate details and colours, it might take a bit longer.
Is it possible to create a snowman using a digital device or computer?
Certainly! Drawing a snowman digitally is a breeze with the help of graphic design software, drawing tablets, or smartphone apps. Digital drawing offers a lot of flexibility and makes it easy to revise and experiment with different styles and colors.
Conclusion
Creating a snowman can be a delightful way to embrace the winter season and unleash your artistic abilities. This classic and fun activity is great for artists of all skill levels, and it’s ideal for embracing the holiday season. Remember, practice makes perfect, so keep experimenting, refining your technique, and having fun as you bring your creation to life on paper. Enjoy your artistic endeavors!
Check out this fun guide for easy steps on drawing fluffy fur! This fun guide offers creative techniques and tips for young artists to beautifully capture the texture and details of fur in their drawings!

