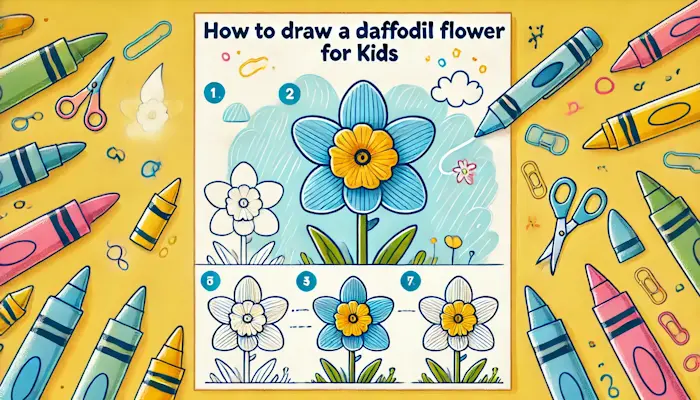
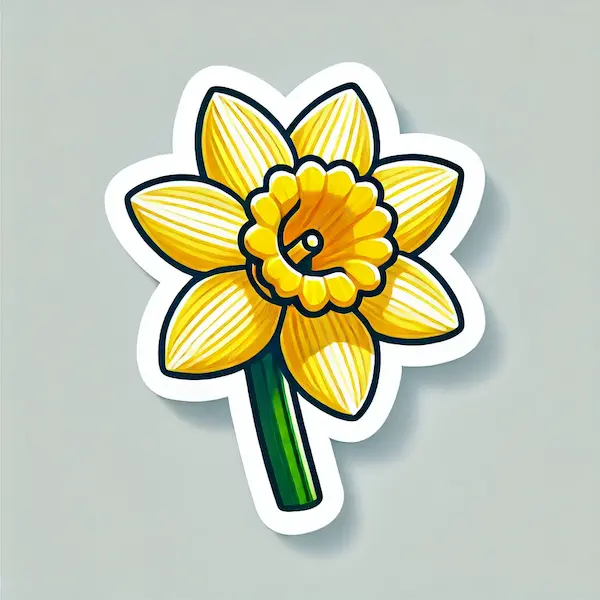
Drawing is a fantastic way for young ones to showcase their imagination, and flowers are perfect subjects to practice with. One of the most fun and lively flowers to draw is the daffodil. The daffodil, with its fun trumpet-shaped center and bright petals, is a delightful and simple subject to draw. This tutorial on how to draw a daffodil is simple, beginner-friendly, and will help young artists create a beautiful flower with ease. Join in the fun, and by the end, they’ll have created their very own drawing of a beautiful daffodil!
Table of Contents
Items Utilized
Before you dive in, gather up these materials to get started:
- A piece of plain drawing paper is just right.
- A simple HB pencil is perfect for doodling and drawing fun pictures. For adding those little touches, a pencil that’s a bit softer, such as a 2B, is a great choice.
- Magic tool: Perfect for correcting little oopsies.
- Bright Pencils/Crayons: Sunny yellow for the petals, cheerful orange for the trumpet, and vibrant green for the stem and leaves.
- Dark Marker (optional): To highlight the final artwork, if you want to.
Ideas for Daffodil
Creating art with daffodils can be an exciting adventure, allowing for playful exploration of various themes!
- Spring Garden: Include more colorful blooms to make a lively garden display.
- Fun Nature Scene: Create a cheerful daffodil in a sunny grassy area or next to a playful fence.
- Fantasy World: Young ones can create their daffodil to be extra large or glowing, adding a sprinkle of magic.
- Animal Pals: Imagine a lively scene with tiny creatures like buzzing bees and fluttering butterflies dancing around the bright daffodil.
Step-by-Step Instructions on How to Draw a Daffodil
Let’s jump into creating a lovely daffodil with simple, step-by-step guidance!
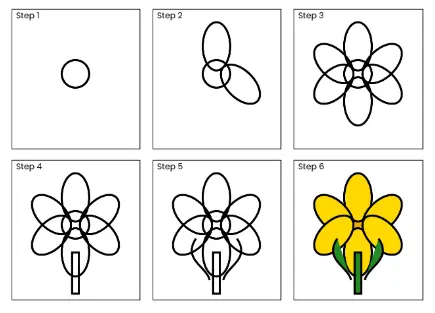
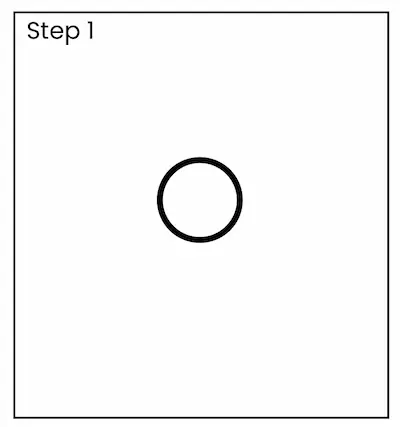
Step 1: Create the Heart of the Daffodil
Start by making a tiny circle right in the center of your paper. This circle will be the foundation of the trumpet or corona (the middle section) of the daffodil.
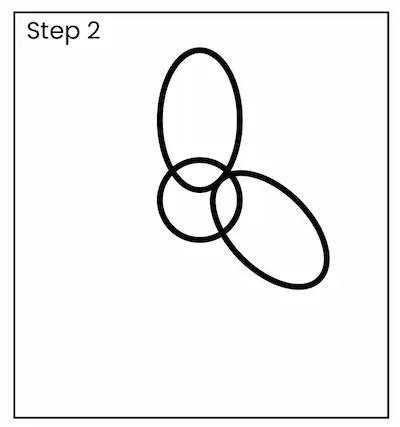
Step 2: Make the Trumpet
Now, let’s create the trumpet shape of the daffodil! From the outer edges of the circle, draw another wavy circular line around it, creating the playful, ruffled edge of the trumpet. The lines can be a bit wobbly, since the edge of the corona isn’t totally straight.
Step 3: Add the First Fun Flower Part
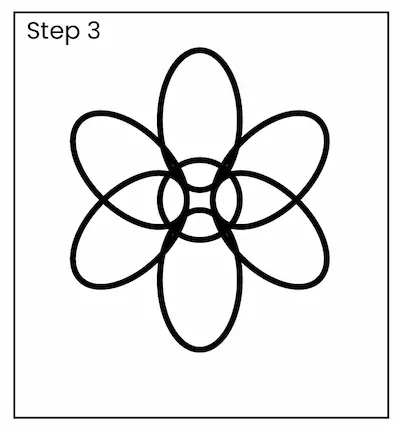
Alright, let’s start by drawing the first petal! Begin at the bottom of the trumpet and sketch a big, rounded petal that stretches outwards. Daffodil petals are often long and have a little point at the end.
Step 4: Add Extra Petals
Start by adding five more petals around the trumpet shape, just like the cheerful flowers do! Every petal ought to be roughly the same size as the first and should gently overlap the one beside it. Make sure the petals spread out nicely from the middle!
Step 5: Attach the Stem
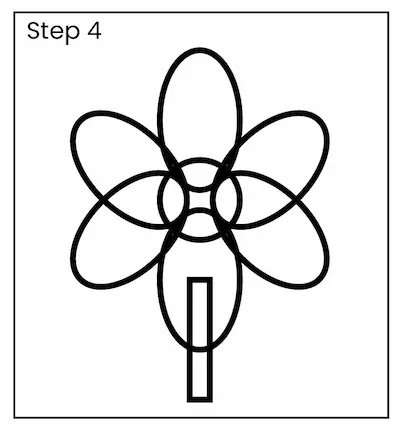
Now, let’s create the daffodil’s tall, straight stem! Begin at the base of the flower and draw a straight line downwards. Try giving the stem a little curve for a more playful appearance.
Step 6: Attach the Foliage to the Stem
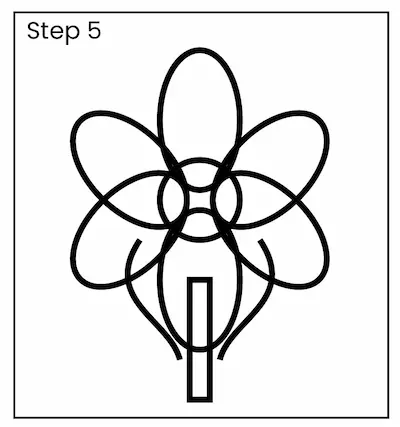
Daffodils have tall, slender leaves that reach for the sky. Start by sketching one or two leaves that grow from the bottom of the stem. Ensure the leaves are elongated and slender, gracefully curving to match the form of the bloom.
Step 7: Enhance the Petals and Trumpet with Fun Details
To make your flower more lifelike, add a few lines on each petal to show texture. These lines should begin at the bottom of each petal and stretch outwards. For the trumpet, sprinkle in some fun little details inside the circle, like tiny dots or wiggly lines, to make it pop with a more 3D look!
Step 8: Brighten Up Your Daffodil
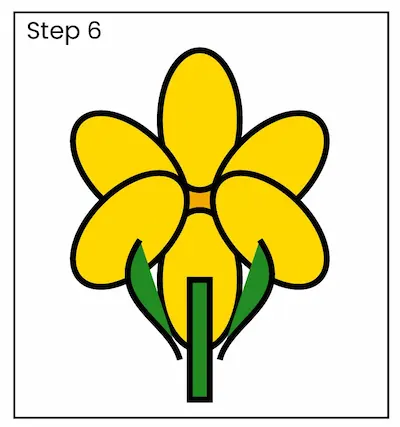
Now that the drawing is all done, let’s get ready to add some colors! Choose a bright yellow for the petals and a deeper orange or yellow for the trumpet. Make the stem and leaves a bright green color! Try adding a gentle touch of color to make the flower pop with more dimension.
Step 9: Include a Fun Background (Optional)
For an extra touch, little ones can draw a background like a grassy field, other daffodils, or the sun shining above. This brings a fun twist to the daffodil and makes the picture more exciting!
Find Your Spark
Young ones can find inspiration from many places when sketching daffodils:
Explore the great outdoors by taking a fun walk and spotting beautiful daffodils in a garden or park when spring arrives.
Pictures: Take snapshots of daffodils to showcase their unique shape and vibrant color.
Books: Explore picture books that showcase blossoms to observe how various artists depict daffodils.
Famous Art: Creative minds like Vincent van Gogh often captured the beauty of flowers in their work. Exploring flower artworks can spark creativity and encourage experimentation with new techniques and ideas.
FAQs: How to Create a Daffodil Drawing
Is it challenging for little ones to draw a daffodil?
No, the daffodil is an easy flower to draw because of its straightforward shape. By following step-by-step instructions, young artists can easily create a beautiful daffodil drawing.
How many petals does a cheerful daffodil have?
Daffodils usually have six petals that are spread out nicely around the central trumpet.
What colors are best for drawing a daffodil?
The classic colors for daffodils feature cheerful yellow petals and a vibrant orange or deeper yellow trumpet. However, little ones can use their imagination and choose any colors they like!
Is it possible to use markers instead of pencils to create a daffodil drawing?
Absolutely! You can use markers to trace around the daffodil or to bring in vibrant colors. However, it’s best to use pencils during the sketching phase so any oops moments can be quickly fixed.
What are some tips to enhance the realism of my daffodil drawing?
To make your drawing more lifelike, focus on the little things. Make the petals fun by adding some wiggly lines, use shading to give them a little pop, and throw in some quirky little imperfections to keep it real and lively!
Case Study: A Fun Daffodil Drawing Activity
In a lively classroom, a group of eight little ones aged 6-8 was excitedly led through the fun process of drawing a daffodil with these steps. The lesson kicked off with a fun chat about daffodils, and then we jumped into a step-by-step drawing demonstration! By the end of the activity, each little artist had proudly finished their drawing.
Result:
Excitement Overflow: The little ones were overjoyed with their final creations, with a few even asking to sketch more flowers afterward.
Skill Development: By focusing on basic shapes (circles, ovals, and lines), young learners improved their understanding of how complex objects can be broken down into simple parts.
Imagination: A few little ones tried out various colors for their daffodils, highlighting their imaginative flair and unique style.
Conclusion
Learning how to draw a daffodil is a delightful and entertaining activity for young ones of all ages. This fun and simple guide offers a clear path for little ones to enhance their drawing abilities while having a blast with creativity. Whether it’s in the classroom or at home, drawing a daffodil is a fantastic way for little ones to express themselves and discover the wonders of nature. So grab your art materials, follow the steps, and have fun making a beautiful daffodil!

