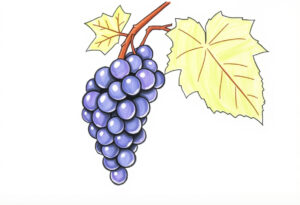
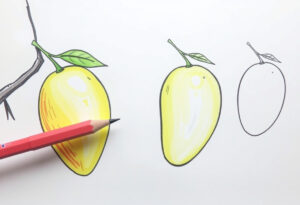
Plums are a delightful and juicy fruit with a vibrant, deep color that makes them a fun subject to draw. Their smooth surface and round shape make them relatively simple to sketch, which is perfect for young artists who are developing their drawing skills. This fun guide will help little ones learn to draw a plum easily, encouraging them to play with colors and shapes in a creative and enjoyable manner.
Table of Contents
Supplies Utilized
Before you begin your fun plum drawing, make sure to collect these supplies:
- Use any fun drawing paper or a colorful sketchpad.
- Pencil: A fun tool for drawing and creating!
- Correction tool: Perfect for making changes or fixing mistakes.
- Brightly colored pencils and crayons in purple, red, blue, and green for bringing the plum and its leaf to life with color.
- Black Marker (optional): To outline the artwork and make it look extra special.
Ideas for Plum Drawing
Little ones can unleash their imagination with various themes to elevate their plum drawings:
Plums in a Bowl: Create a fun drawing of plums in a bowl, adding some depth to make it look like a lively still life.
Single Plum on a Branch: Make a delightful plum dangling from a branch with a cheerful leaf, giving it the appearance of being freshly picked from the tree.
Plum Orchard: Create a vibrant picture featuring several plums hanging from a tree, surrounded by lush leaves, sturdy branches, and a bright, cheerful sky.
Plum Faces: Add fun, expressive faces to the plums for a cartoonish, playful style that will bring joy and smiles.
Easy Guide on How to Draw Plums for Young Artists
Let’s jump into the fun and easy steps for creating a simple and realistic plum drawing!

Step 1: Create the Outline of the Plum
Begin by sketching a big, circular form right in the middle of your paper. Plums are usually round, but they might not be perfectly round—so it’s okay if the shape is a little bit off. You can also make the bottom a little pointy to mimic the natural shape of a plum.

Step 2: Attach the Stem
At the top of the plum, make a little, curved line for the stem. The stem ought to be slender and gently curved to appear more lifelike. This is the spot where the juicy fruit connects to the tree branch.

Step 3: Create the Leaf
Next, create a fun little leaf connected to the stem. The leaf should be shaped like a long oval with a pointy end. Draw a line right down the middle of the leaf to show where the vein is! The leaves on plum trees are quite petite, so keep the leaf size small.

Step 4: Make the Plum Fun and Tasty!
To enhance the appearance of the plum, add a gentle curve or line down the middle to show the natural seam that goes from the top to the bottom. Plums are so shiny and fun to touch, and that little line on them makes them look extra special! You can also add a little bit of shading to one side of the plum to make it look more lively and fun!

Step 5: Have Fun Drawing Several Plums (Optional)
If you want, you can add more plums next to the first one to make your picture even more fun and colorful! You can change the size and angle of the plums to make the drawing more exciting, or even place one plum partly behind another for a fun layered effect.
Step 6: Add Color to the Plum
Plums are so colorful! For this drawing, let’s use fun shades of purple and red to bring the fruit to life. Begin with a layer of purple, then sprinkle in some red or blue to create a rich, deep plum color. The stem should be a nice brown, and the leaf should be bright and cheerful in various shades of green.
Step 7: Sprinkle in Some Bright Spots and Dark Areas
To make your plum look shiny and delicious, add a little white or lighter spot on one side to show where the light is bouncing off the fruit. Try adding a darker shade to one side to give it a shadow effect, which will make your drawing look more alive and pop out!
Step 8: Include Fun Background Features (Optional)
For more fun, include a backdrop like a tree branch, some other plums, or a cheerful scene with a bright sky and grassy ground. This can add more fun and excitement to the drawing, making the entire scene come alive!
Find Your Spark
Here are a few sources of inspiration to help young artists with their plum drawings:
Visit a Farmer’s Market: Observing real plums at a market can help little ones grasp their shape, color, and texture, which will enhance their drawing skills.
Still Life Photography: Check out images of fruit bowls or still life paintings showcasing plums for inspiration on composition and colors.
Books About Fruit: Numerous books for young readers featuring fruit come with illustrations that can ignite imagination and showcase various drawing styles of plums.
Fruit in Nature: If possible, observe a plum tree or other fruit-bearing plants to see how plums grow, which can help young artists add natural elements like leaves and branches to their drawing.
FAQs: How to Sketch Juicy Fruits
Is drawing a plum tricky?
Absolutely not! Plums have a simple round shape, making them an easy subject for young artists to practice drawing. Using just some simple shapes and colors, anyone can make a plum that looks really real!
What colors would be fun to use for my plum drawing?
Plums come in a variety of colors, including purple, red, yellow, and even blue! Little ones can use various shades of purple and red to make a lifelike plum or try out other colors for a fun twist.
What are some ways to enhance the realism of my plum drawing?
To make the drawing more fun, think about adding some cool shadows, bright spots, and interesting textures! Using various shades of purple and adding a bright spot to show a reflection can make the plum look more realistic and vibrant.
Is it okay if I draw a lot of plums?
For sure! Sketching a bunch of plums in a bowl, on a tree, or in a pile brings fun and excitement to the artwork, making it more captivating. Feel free to try out various angles and sizes!
What steps can I take if I mess up?
Don’t stress about errors—they’re just a fun part of creating art! Feel free to grab your eraser to tidy up any little hiccups, or think about how you can turn that oops into something fun in your artwork!
Case Study: Plum Drawing Class for Young Artists
A local community center organized a fun fruit-themed drawing class, featuring plums as one of the exciting fruits to inspire creativity. The instructor guided the little ones through a fun, step-by-step process for drawing a plum, encouraging them to sprinkle in their own creative flair.
Outcome: Enhanced Skills: The young artists discovered techniques for shading and creating highlights, making their drawings appear more lifelike.
Creative Expression: Some little ones added faces to their plums, while others drew entire plum trees, showcasing their imagination and uniqueness.
Fun and Engagement: The simple structure of the plum allowed the little ones to feel successful in their drawings, boosting their confidence and encouraging them to keep creating.
Conclusion
Drawing a plum is a delightful and simple activity that encourages young ones to discover shapes, colors, and textures while enhancing their creative abilities. The easy, round shape of the plum is perfect for those just starting out, and using fun touches like shading and highlights makes the drawing really pop! This fun guide helps little ones easily follow along and make their own vibrant, lifelike plum drawings. So pick up your crayons and markers, and let’s create some delicious plums!


