How to draw a pen is an enjoyable and simple task that can boost your drawing abilities. This fun guide will help you draw a pen, whether you want to keep it simple or add lots of details, all in easy steps! Let’s jump right in!
Table of Contents
What You Will Require
To create a pen, gather some simple materials:
- Any kind of paper is just fine!
- Writing tool: For drawing the shape.
- Correction tool: To make everything just right.
- Ruler: Not necessary, but helpful for drawing straight lines.
- Fun tools for bringing some vibrant hues to your writing!
Exciting Ideas for Your Pen Illustrations
Explore various themes to give your pen drawing a special touch! Here are some fun suggestions:
Classic Ballpoint Pen
What It Is: The basic tool you grab for jotting down notes in class.
How It Appears: Extended and sleek with a tiny point at the end.
Colours: Bright blue, deep black, or vibrant red.
Fountain Pen
What It Is: A special pen designed for beautiful writing or artistic creations.
How It Looks: Sleek with a sharp metal tip at the end.
Colors: Shiny hues like gold, silver, or black adorned with fun patterns.
Gel Pen
What It Is: Colourful pens that are super fun and come in a variety of shades.
How it looks: It resembles a ballpoint pen, but it’s got a chunkier body.
Colours: Vibrant and playful shades such as pink, purple, or green.
Step-by-Step Instructions to Draw a Pen
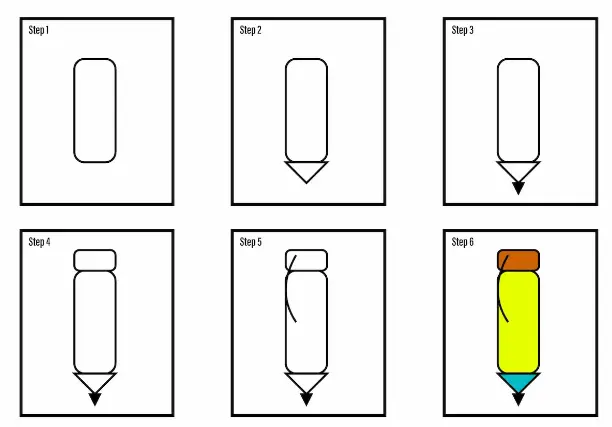
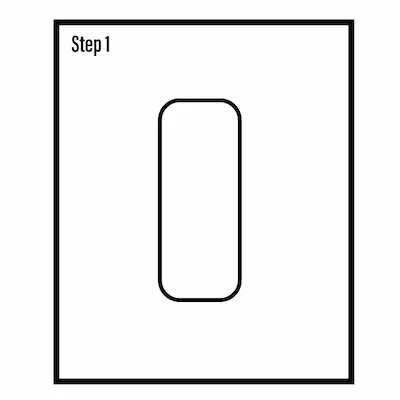
Step 1: Create the Body of the Pen
Sketch a long, slim rectangle for the main part of the pen. Grab a ruler to make those lines perfectly straight!
Round the ends a bit for a more lifelike appearance.
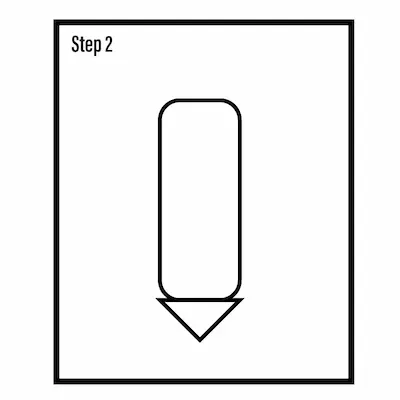
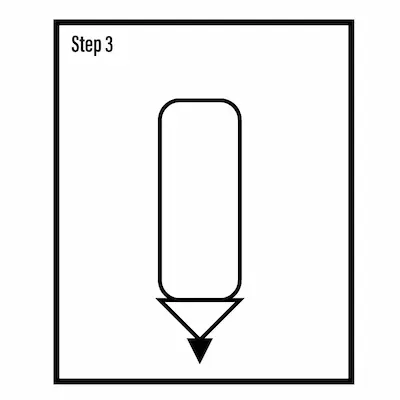
Step 2: Attach the Pen Tip
At the bottom of the rectangle, add a little cone shape to create the pen tip.
If you’re sketching a fountain pen, give the tip a sharper point.
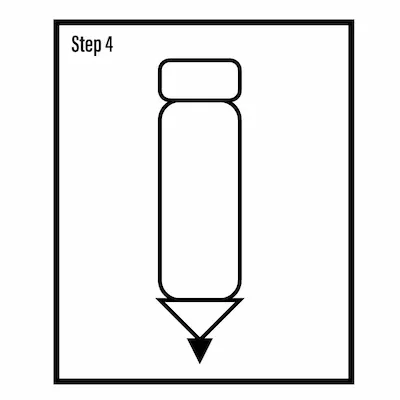
Step 3: Add the Fun Pen Cap or Clip (Optional)
If your pen has a cap, create a fun little rectangle or oval at the top of the pen to show it off!
If your pen has a clip, make a fun, wiggly line along the side of the pen!
Step 4: Add Fun Features
Draw some cool lines or shapes on the pen’s body to make it more interesting, like a spot to see the ink or a fun grip!
Create tiny patterns or even a logo to enhance its authenticity.
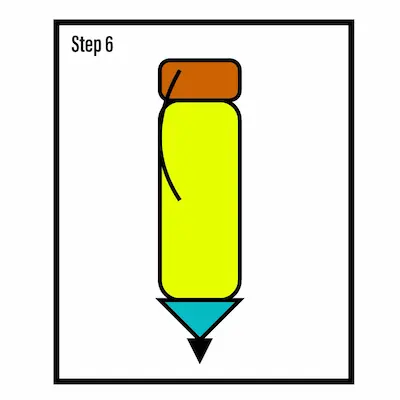
Step 5: Add Some Colour to Your Pen (Optional)
Grab some fun markers or colourful pencils to brighten things up!
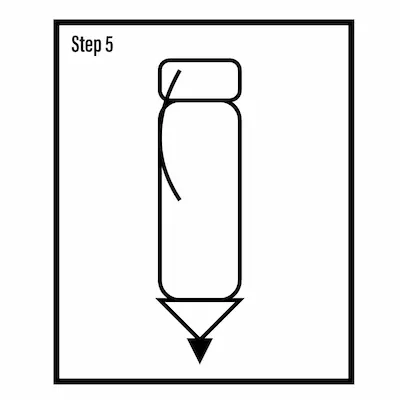
Writing tools are available in a rainbow of shades, so let your imagination run wild!
Find Your Spark
Check out the pens you’ve got at home or in your pencil case! Look at their forms, hues, and little features. Explore the fun and creativity that comes with various types of pens, such as whimsical fountain pens or vibrant gel pens!
FAQs
What if my pen isn’t just right?
That’s perfectly fine! Keep trying, and each time you create, it will be special in its own way. Just enjoy it and let loose!
Is it possible to sketch a pen freehand?
Absolutely! Feel free to sketch without any constraints if you’re aiming for a more organic and playful appearance. Using a ruler can be fun and useful, but it’s not a must-have!
What are some ways to enhance the realism of my pen?
Include fun elements like colorful shading, a playful logo, or wavy lines to illustrate how to hold the pen comfortably. Small details like these can bring your artwork to life.
What colours would be fun to use for my pen?
Feel free to choose any colours you want! Classic pens come in blue, black, or red, but why not use cheerful colours like pink, purple, or green for a playful vibe.
Case Study: How Max Discovered the Joy of Drawing with a Pen
- Age: 9 years old
- Hobby: Creating and Storytelling
- Project: Creating a Fun Pen Illustration
The Challenge:
Max was excited to create a drawing of a pen because he enjoys expressing himself through writing and art. He had drawn fun things before, like stars and trees, but never something as intricate as a pen. He was a bit puzzled about how to make it appear like a genuine writing tool.
The Plan:
Max thought it would be fun to begin with a basic ballpoint pen. He carefully followed the fun guide to create the pen’s barrel, tip, and clip. Because he loved vibrant hues, he decided to create a drawing with a lively gel pen.
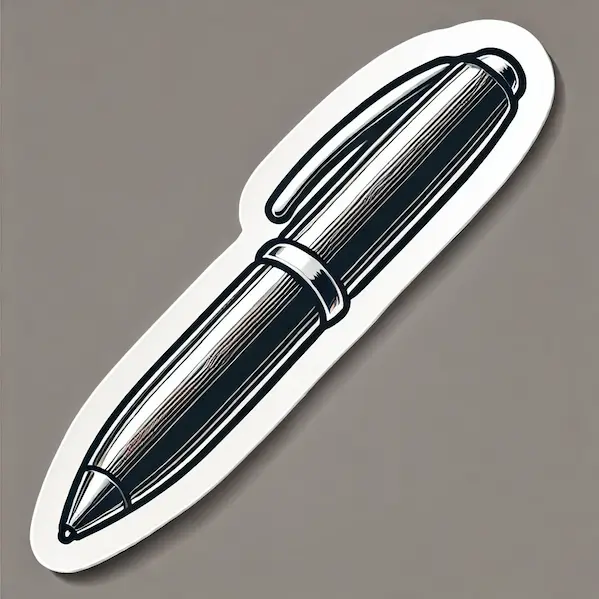
Easy-Peasy Guide:
- Max created a big, long rectangle for the pen’s body.
- He added a tiny cone shape at the bottom for the pen tip.
- He drew a small, playful curve on the side for the pen clip.
- He sketched lines on the barrel to give the pen a fun grip design.
- Max decorated his pen with a vibrant blue hue and sprinkled tiny stars all over it to give it a unique touch.
- The outcome: Max’s pen drawing came out fantastic! It appeared to be a playful, vibrant pen. He was super excited about how it turned out and even chose to create a whole bunch of pens in all sorts of fun colours.
What Max Discovered:
Getting Better with Time: Starting with basic shapes helped in adding fun details later on.
Imagination: Incorporating tiny designs like stars made his pen drawing stand out.
Enjoying Creativity: Max discovered that drawing is all about enjoying himself and sharing his imagination.
Max’s Tip: “Have fun and enjoy the process!” Just keep creating, and sprinkle your own unique flair into it!
Conclusion
Sketching with a pen is a delightful and simple way to enhance your creative abilities. Whether you’re sketching with a basic ballpoint pen or a vibrant gel pen, you can follow the steps in this guide to craft your very own special design. Don’t forget, it’s all about enjoying yourself and putting your unique spin on things! Just like Max, you can begin with simple shapes and then enhance your drawing with fun details to make it really pop! So pick up your pencil, paper, and some colors, and begin creating your ideal pen today!
“How to Draw Pencils” provides a fun and easy guide for young artists to make lifelike pencil drawings. It starts with outlining the simple shape, then adds fun details like the pointy end, the soft part, and the shiny band, before diving into making it look more real with textures and shadows. The tutorial is designed for those just starting out and emphasises looking closely at actual pencils to capture the right proportions and details. It also highlights how fun it is to practise sketching and shading techniques.

