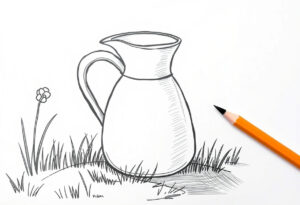
Drawing is a fantastic way for little ones to showcase their imagination and enhance their dexterity. In this guide, we’ll dive into the fun of drawing a teapot step-by-step, ideal for those just starting out. This all-in-one guide is packed with everything little creators need, from essential supplies to fun and imaginative themes, to help them craft a stunning teapot masterpiece.
Table of Contents
Supplies Utilized
When drawing a teapot, picking the right materials makes the whole experience fun and easy! Here’s what you’ll require:
Pick a strong drawing paper or sketchbook, ideally something thick enough to handle colors if you’re using markers or paint.
For drawing, start with an HB pencil to create the basic shapes, then switch to a 2B or darker pencil for the outlines. The soft pencil makes it super simple to fix any oops moments!
A good-quality eraser is essential, as little ones may want to adjust their shapes as they go. Kneaded erasers are super handy because they can erase cleanly without leaving any smudges behind!
Markers or Crayons: These bring a fun and vibrant flair to the finished artwork. Washable markers are fantastic for little ones, while colored pencils or crayons offer simple shading choices.
Ruler: Although it’s not essential, using a ruler can assist in creating straight lines for anyone looking to give their teapot a more organized appearance.
Optional Supplies: For extra creativity, little ones might enjoy using watercolor paints or glitter glue to make their teapots even more special!
Themes
Ideas Ideas add character to the drawing, making every teapot special. Here are some exciting and playful themes to explore:
Classic Teapot: A delightful theme inspired by beloved tea sets. Young ones can create a vintage look with simple floral designs, earthy colors, and soft curves. This theme is ideal for those seeking a timeless style.
Whimsical Teapot: Picture a playful, animated teapot with large, cheerful eyes and a big grin! Giving the teapot a face makes it come alive, resembling a character straight out of a whimsical tale. Go for large, lively eyes and a happy grin, paired with vibrant hues.
Fantasy Teapot: For little ones who adore enchantment and imagination, a fantasy teapot provides limitless adventures. It might have fun designs like stars, swirls, or even little creatures! This style opens up a world of creative possibilities, featuring whimsical elements like wings, little legs, or a magical appearance.
Festive Teapot: Personalize the teapot to reflect a beloved celebration. For instance, a festive teapot could showcase cheerful red and white stripes, while a spooky teapot might display a friendly jack-o’-lantern. This theme inspires young minds to explore holiday symbols and colors.
Animal Teapot: Turn the teapot into a fun animal friend! Picture a whimsical teapot designed to look like a playful pet, complete with adorable ears on the lid and a charming tail for the handle. Little ones will enjoy mixing animals with common items.
Every theme can ignite fresh ideas, inspiring young ones to customize their teapot and make it uniquely theirs.
Step-by-Step: How to Draw a Teapot

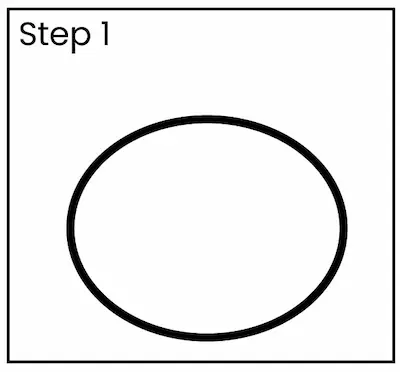
Step 1: Create the Bottom Shape of the Teapot
Begin by sketching a rounded shape at the lower part of the page. This oval shape will be the starting point for your fun teapot creation! It helps establish the teapot shape and will lead the way for the rest of your drawing.
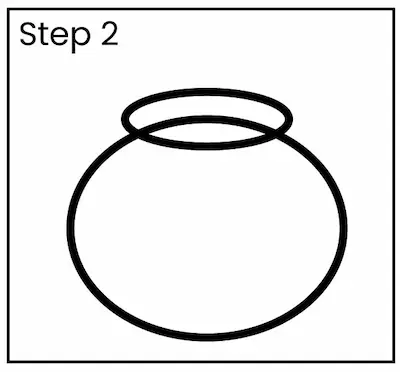
Step 2: Sketch the Main Part
Above the base, create a bigger oval or round shape to shape the main part of the teapot. This section ought to be broad and curvy, much like the shape of a kettle or teapot. Make sure to create a design where both sides look the same and fit together perfectly. It’s okay if it’s not just right—keep trying and you’ll improve!
Step 3: Attach the Spout
On one side of the teapot’s body, create a fun little curve that sticks out to make the spout. The spout is like the teapot’s “nose” and helps to pour the tea out, just like a fun little helper! Draw another curved line next to the first one to give it a three-dimensional effect, and join the two lines at the end to finish the spout.
Step 4: Create the Handle
On the other side of the teapot, make a backward “C” shape to form the handle. The handle should have a fun curve and appear sturdy enough for little hands to grip. Feel free to try out various shapes, like a heart-shaped handle or a loop handle, based on the theme you pick!

Step 5: Put on the Top
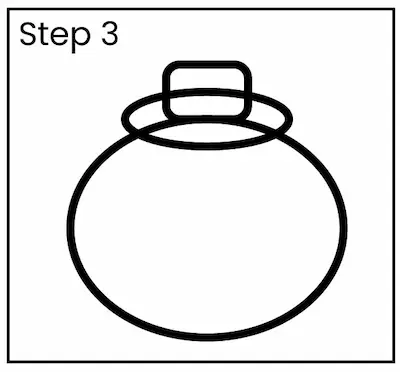
At the top of the teapot’s body, create a little oval or circle for the lid. This oval needs to be placed right in the middle of the teapot body. Include a small circle or knob at the top of the lid to enhance its realism.
Step 6: Make the Teapot Look Fun!
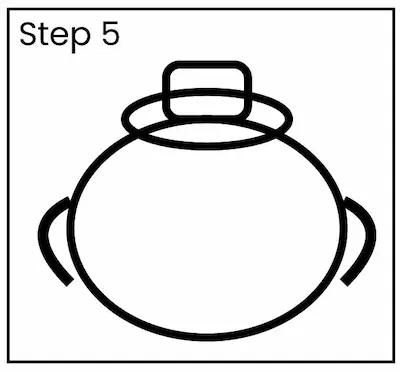
Now for the exciting part—adorning your teapot! Based on the theme, you can include fun designs like cheerful dots, playful flowers, lively stripes, or even adorable little characters. Start by sketching these patterns gently, and once you’re satisfied with how they look, trace over them again.
Step 7: Draw the Outline and Add Some Color
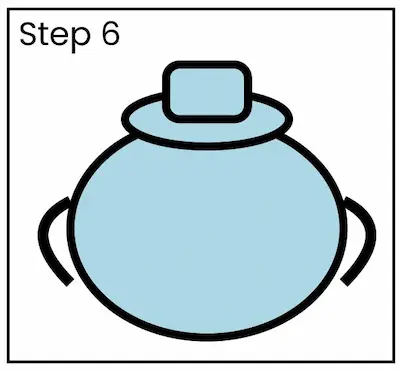
Go over your last drawing with a darker pencil or marker to make it stand out! Once the outline is ready, bring the teapot to life with vibrant colors using crayons, markers, or colored pencils. Experiment with mixing various colors to create a lifelike appearance for your teapot, or choose vibrant, eye-catching hues for a fun, playful style.
Tip for Coloring: Choose bright and different colors for the main part and the fun designs to make your teapot really pop! If the body is light blue, adding dark blue dots will create a fun and playful effect.
Find Motivation
Ideas for teapot drawings can spring from many different places:
Stories and Animation: Characters such as Mrs. Potts from Beauty and the Beast demonstrate how to transform a regular object like a teapot into something enchanting and lively. Animated shows often amplify characteristics, making them perfect for introducing playful elements.
Real Teapots: Check out pictures of both old-fashioned and contemporary teapots to explore various shapes and designs. Some real teapots are super fun, with bright colors, sparkly edges, or cool shapes!
Nature: Colorful blooms, towering trees, and playful creatures can spark amazing ideas. For instance, you might create fun vines curling around the teapot or add cheerful butterfly patterns to make it feel lively and inspired by the outdoors.
Holiday Themes: Seasonal decorations bring so much joy! You can add sparkly snowflakes for a cozy winter teapot or cute little pumpkins for a fun fall vibe. Think about using festive colors such as bright red and cheerful green for Christmas or vibrant orange and spooky black for Halloween.
By exploring their surroundings, little ones can find inspiration to craft their teapots in the most imaginative and intricate ways they can dream up.

FAQs
What age range is this activity appropriate for?
This teapot drawing tutorial is perfect for young artists aged 5-12, but older ones can also have fun exploring more intricate designs.
What’s the most fun way to brighten up the teapot?
Coloring tools like markers or crayons are super fun for bold shades, while watercolor brings a gentle touch. Encourage little ones to try out both options.
Can little ones add a face to the teapot?
For sure! Adding a cheerful face, bright eyes, or even little arms can transform the teapot into a delightful character, making it more enjoyable and unique.
How much time does it take to sketch a teapot?
This fun activity lasts around 30-45 minutes for little ones, but the duration might change based on how much detail they wish to include.
Is this activity helpful for improving drawing abilities?
Absolutely, sketching a teapot is a fun way to explore shapes, symmetry, and develop those little hand skills. It’s a fun activity for understanding proportions and adding some flair.
Case Study: Fun Learning Experience
An art teacher at a primary school set up a fun “Teapot Design Day” where young learners could unleash their creativity by drawing their own teapots inspired by different themes. Every little one picked a unique theme, and the teacher observed that as they added their decorations, their excitement grew. The grown-ups were amazed by how each teapot showed off the unique traits of their little ones, and a few even decided to showcase the creations in frames. The teacher also noted that those who were a bit reserved often utilized this project to share their thoughts through vibrant colors and fun patterns, highlighting how the project helped in building confidence and sparking creativity.
Conclusion
Creating a teapot is not just a fun project; it’s a chance for young ones to unleash their imagination, discover different forms, and enhance their dexterity. This guide offers all the steps needed to create a delightful teapot drawing, from selecting a theme to incorporating fun details. By drawing from things they see around them, special occasions, or even beloved creatures, little ones can create a teapot that’s uniquely theirs. So pick up your crayons, colored pencils, and some fun paper, and begin creating your awesome teapot today!


