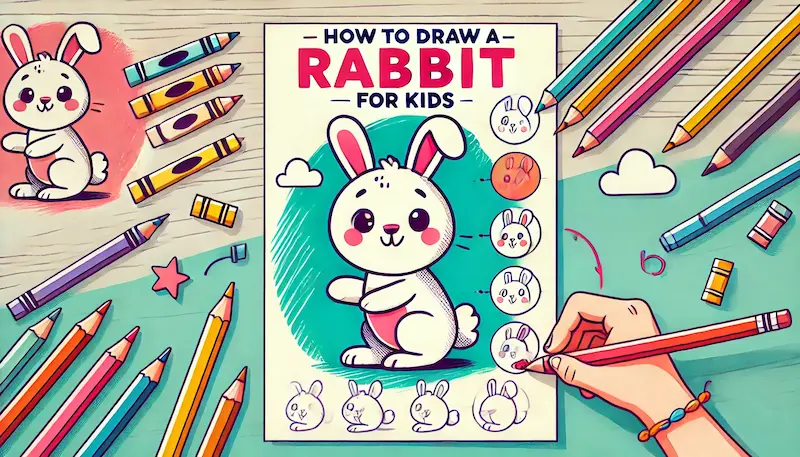
Young children can draw as a way of expressing themselves because it is quite fun and creative. A bunny with fluffy tails, big ears, and a prancing attitude is undoubtedly a delight to sketch. This blog is a step by step guide on how to draw a cute bunny with ease. It will contain simple to understand instructions, FAQs, theme imaginations, material lists and a case study to help children boost their creativity.
Table of Contents
Materials Needed
Now, before we start this expedition of drawing a bunny, let us gather all the supplies first:
- · Static Supplies – Any blank piece of paper or drawing pad.
- · Pencils – Do not forget to grab 2B or HB sketching pencils!
- · Erasers – Perfect for fixing small mistakes.
- · Black Markers – Remember to outline the finished drawing using a black marker then, you will need to outline the finished drawings with it.
- Crayons or colored pencils: To color the rabbit and its surroundings, we would recommend the following colors; green, gray, white, brown, and pink.
- A ruler is a good addition when sketching since it helps to measure. While it is not essential, it may be enjoyable.
Fun Ideas for Bunny Illustrations
Coming up with a guiding story for the drawing can make it more creative and fun.
Here are some interesting rabbit ideas:
- Garden Bunny: A Ray of sunshine hopping around a bunny patch surrounded by colorful plant veggies.
- Spring Meadow: A gorgeous view of a little bunny prancing through a field filled with Flowers as the Sun sits high above the sky.
- Whimsical Bunny: A macrophotograph of a bunny with large eyes as well as an attentive smile with a carefree ponytail styles.
- In a sparkle adorned Magic Rabbit emerges from a rabbit hat expecting Stars and tiny particles to hover around the hat.
- Snow Bunny: A fluffy white rabbit hopping through a winter wonderland, surrounded by twinkling snowflakes drifting down from the sky.
Encourage kids to choose a theme that sparks their enthusiasm the most!
Step-by-Step Instructions: Drawing a Rabbit
Here’s a step-by-step guide to help kids create their rabbit masterpiece.
Step 1: Create the Bunny’s Face
- Begin by creating a big oval shape right in the center of your paper. This will create the bunny’s head.
- Inside the oval, draw two small circles for the eyes.
- Draw a tiny triangle beneath the eyes for the nose, and then create a “W” shape just below it for the mouth.
Step 2: Attach the Ears
- At the top of the head, sketch two elongated ovals to create the rabbit’s ears.
- Inside each ear, include smaller ovals to represent the inner ear.
Step 3: Create the Body
- Just below the head, create a big oval shape for the body. Ensure it’s just the right size for the head.
- Connect the head to the body with two short, curved lines to form the neck.
Step 4: Draw the Legs
- At the bottom of the body, draw two large oval shapes for the hind legs.
- Place two smaller ovals at the front of the body to represent the front legs or paws.
Step 5: Add the Tail
- On one side of the body, draw a cute little circle or a fluffy cloud shape for the tail.
Step 6: Add Softness and Fun Features
- Draw fun zigzag lines on the head, body, and tail to make it look all fluffy and cozy!
- Sketch tiny whiskers sprouting from the sides of the nose.
Step 7: Trace with a Dark Marker
- Trace over the pencil lines with a black marker to define the rabbit’s shape.
- Wipe away any leftover pencil marks for a tidy appearance.
Step 8: Add Some Color to Your Bunny
- Color the rabbit’s body with shades of grey or white.
- Apply a lovely shade of pink to the inner ears and nose.
- If the theme features a garden or field, use green for the grass and orange for the carrots.
- For a fluffy little friend, use white for the adorable creature and a soft light blue for the chilly backdrop.
Step 9: Include a Fun Background (Optional)
- Add Colorful Blooms, Green Plants, Or A Magical Background Behind The Rabbit to make it even more fun!
- Use Some Bright Colors That Will Make The Drawing Pop And Become Interesting To All.

Real-Life Case Study: How Emily Found Her Artistic Spark by Drawing Rabbits
Emily is 8 years old and loves all pets, but has difficulties approximating the required degree of confidence during the art class, especially with bunnies, because though she enjoyed bunnies so much, she is unable to make any representation of the cute creatures on the paper. One day her teacher presented such a wonderful technique for drawing bunnies, only using an oval and a few straight lines to keep it simple.
For her artwork, Emily decided to go for the Garden Rabbit theme. In the artwork that she painted, she included vibrant orange carrots, flowers, and a nice blue sky. She then went on to draw her fluffy companion with crayons using soft pink and grey. Her family and friends found it incredibly easy to relate to her, and were left in awe by her keen use of imagination. This good impression helped in enhancing Emily’s self-esteem and decreased her inhibition around creating other animals and scenes in nature as well. The rabbit she drew marked a great point in her journey towards exploration and creativity.
Frequently Asked Questions About Drawing Rabbits for Young Artists
Q1: What age is this guide for?
This guide is perfect for young ones between the ages of 6 and 12. Assisted baby is 2 or 3 can start working or are able to do this in combination with older kids who already know how to use art.
Q2: In what ways can the drawing be simplified for the younger audience?
You could focus on the head and ears while ignoring the legs and body details. In addition, a cute bunny can help a bit also!
Q3: What if my little one’s bunny is not good looking?
Motivate them to play and enjoy the activity to the maximum! Rather tell them that every drawing is unique and should be appreciated as the unique thought behind the drawing.
Q4: How can we make the drawing activity more enjoyable?
Make up a funny story! For example, tell the little one that she should be thinking about where the bunny lives and what it is doing. This can ignite their imagination and make them want to add interesting details to their art.
Q5: Is it possible to carry out these activities with friends?
Of sure! Kids can collaborate to create a rabbit family, or they can work together to create a large mural of rabbits set in a magical forest.
Conclusion
Embracing self-confidence, enhancing fine motor skills alongside creativity are important parts of a kids life. And more so, drawing rabbits is an activity that packs all those elements together and helps them get better at it. By following these simple steps kids are able to draw a rabbit of their own. Adding a garden or a snowy scenes to the drawing makes it more interesting, in turn making the activity of the kids more adventurous too.
There are expert guides and experienced mentors available that are able to help assist your child in developing their hidden artistic skills. It can be absorbed through tracing and sketching of whole new worlds as one begins to omniphilic in nature. So go and get your crayons along with your sketchbooks while letting your imagination spark. As for the kids, every rabbit they draw has a story which makes it one of a kind.
Let the fun begin!


