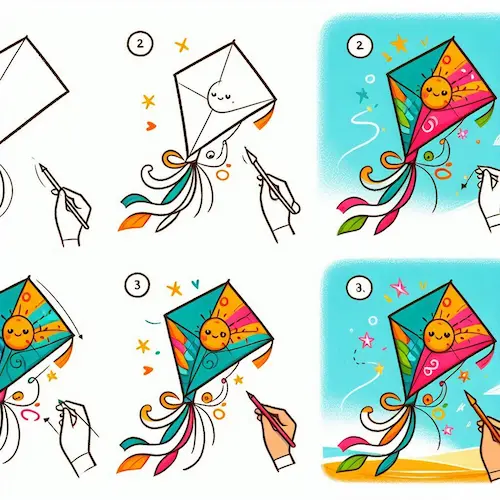
Creating a kite 🪁 is a fun activity that embodies the excitement and thrill of soaring through the sky! A kite’s easy shape and swishy tail make it super fun to draw and decorate with all sorts of colors and designs! Here’s a fun and easy guide to making a bright and happy kite drawing that seems ready to fly high in the sky. 🌤️✨
Table of Contents
Step by Step Guide to How to draw a Kite
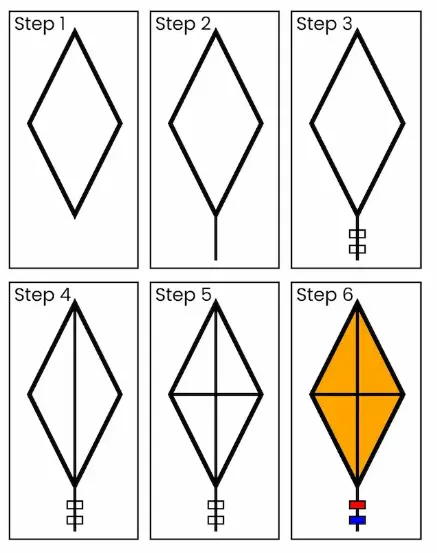
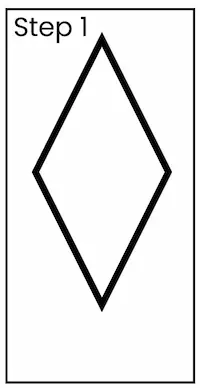
Step 1: Create the Fun Kite Outline
Begin with a shape that resembles a diamond:
- Start by drawing a diamond shape for the kite’s body. Draw a tall line going up and down, then cross it with a shorter line that goes side to side, placing it just a bit lower than the center. These lines will serve as fun guides for balance and harmony.
- Join the ends of these lines to create a sparkling diamond shape. The upper and lower points should be a bit more spread apart than the sides. 💎
Include Border Lines:
- Inside the diamond, create the crossing lines that form the structure of the kite.
- These lines create fun sections for the kite and bring a playful structure to your drawing. 🖊️
Step 2: Sketch the Tail of the Flying Object
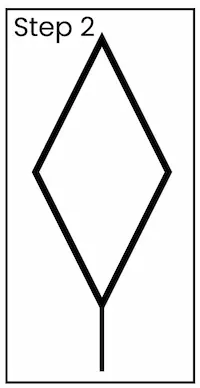
Attach the Tail Line:
- From the bottom point of the kite, draw a fun, wavy line that goes down and out to show the tail.
- Allow the tail line to dance and curve softly, as if it’s moving with the wind. 🌬️
Decorate the Tail with Bow Ties:
- Along the tail line, add little “bow tie” shapes to make the tail look fun and cheerful.
- These can be created as tiny triangles or diamond shapes that come together in the center. Put some along the length of the tail, making sure they’re spaced out nicely. 🎀
Step 3: Decorate the Kite with Fun Designs and Features
Make Fun Areas for Designs:
- Split the diamond shape of the kite into fun sections for adding cool patterns. Frame lines can serve as fun and creative dividers!
- Have fun trying out all sorts of shapes, such as triangles, stripes, or checkered patterns in every part. 🔺🔳

Incorporate Fun Designs:
- How about adding some fun dots, twinkling stars, or playful stripes in those areas? Feel free to leave some spaces empty to add some fun contrast!
- These patterns make your kite look super fun and colorful! 🎨⭐
Step 4: Sketch the Cord and Grip
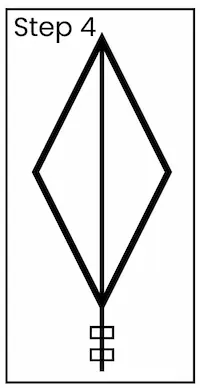
Sketch the String:
- From the bottom of the kite, draw a fun, wavy line that reaches down to where the person having a great time with the kite would be.
- This line doesn’t need to be perfectly straight; a little curve brings a fun sense of movement. 🌀
Include the Handle:
- At the end of the string, create a fun little shape like a small rectangle or an oval to show where the handle is!
- You can add a few tiny lines inside the handle to give it some fun texture and make it appear as if it’s wrapped with colorful string. 🎣
Step Five: Bring in Vibrant Hues and Depth
Pick Fun Colors:
- Flying objects in the sky are usually vibrant, so pick a mix of cheerful, lively colors for the parts and designs on the flying toy.
- Consider using bright colors such as red and yellow, blue and green, or even fun rainbow stripes to make the kite look lively and happy. 🌈🌞
Shadows for Dimension:
- To make the kite more exciting, add a soft shadow on one side of the diamond shape, especially if you want it to look more like it’s popping out!
- Give the tail a gentle shade, paying special attention to the underside of the bow ties to create a whimsical floating effect.
Shine a Light on the Tail:
- For a fun finishing touch, grab a white pencil or eraser to add a little highlight on the tail, making it look light and fluffy! This can create the illusion of dancing in the breeze. ✨

Step 6: Include a Fun Background (Optional)
Create a Fun and Colorful Sky Backdrop:
- If you want to make it even more fun, sketch a cheerful sky filled with soft, puffy clouds surrounding the kite!
- Keep the clouds fluffy and fun so the kite can shine bright and be the star of the show. ☁️🌤️
Incorporate Additional Components:
- Think about including some cheerful birds or a bright sun in the background for added fun! These can be fun outlines to keep the attention on the kite itself. 🐦☀️

Fun Ideas for Making Your Kite Drawing Unique
- Explore Various Forms: Not every kite has to be diamond-shaped! Try out kites in fun shapes like circles, triangles, or even hearts for a special twist! ❤️🔵
- Incorporate Fun Designs and Lively Surfaces: Incorporate fun shapes like wavy lines, polka dots, or zig-zags to make the design more lively and cheerful. 🎉
- Mix Up the Tail Ornaments: Instead of just bow ties, you could add little flags, stars, or ribbons along the tail for extra fun. 🌟🎗️
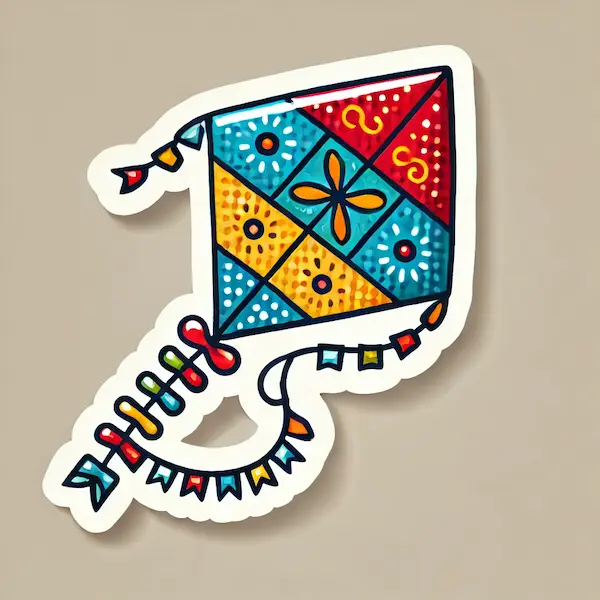
Creating a kite is all about embracing the joyful, breezy sensation of soaring through the sky, so let your imagination run wild with vibrant colors and playful designs. 🌈 By following these easy steps, your kite drawing will appear cheerful and eager to soar high in the sky! 🌬️🪁

