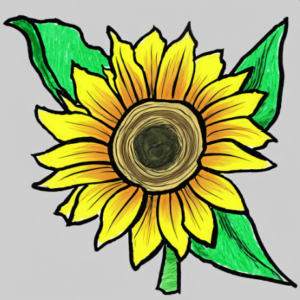
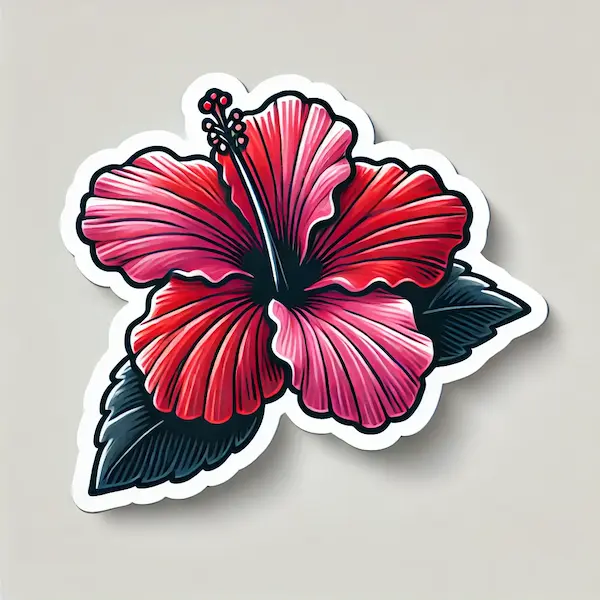
Hibiscus flowers are famous for their eye-catching beauty and big, vibrant petals, which makes them a favorite in gardens and sunny landscapes. With their unique forms and bright colors, hibiscus flowers offer a fantastic chance for young artists to improve their drawing abilities. This guide will take little creators on an exciting journey to draw a hibiscus flower, step-by-step, in a fun and engaging way. This tutorial is ideal for sparking imagination and encouraging creative fun, whether for a craft session or an artistic adventure.
Table of Contents
Materials Used
Before you dive into your drawing adventure, gather these fun materials:
- Any kind of sketch or drawing paper is perfect for fun creations!
- A regular HB pencil for starting off the drawing.
- Rubber: Perfect for fixing oopsies and polishing your artwork.
- Vibrant shades such as red, pink, yellow, or orange for the flowers, paired with green for the foliage.
- Black Marker (optional): To outline and finish the drawing for a tidy look.
Themes for Hibiscus Drawing
Little ones can dive into different themes while sketching hibiscus flowers to spark their imagination:
- Sunny Paradise: Imagine a lively scene filled with bright hibiscus blooms surrounded by a variety of lush tropical plants and greenery, highlighting their cheerful colors.
- A beautiful flower in a charming vase: Show a single bloom set in a lovely container, emphasizing its gracefulness.
- Bright and cheerful hibiscus flowers with playful hummingbirds buzzing around, highlighting the delightful connection between the beauty of nature and its lively inhabitants.
- Seasonal Hibiscus: Discover the vibrant beauty of hibiscus flowers as they transform in various seasons or settings, like alongside the beach or against a stunning sunset backdrop.
Step-by-Step Instructions on How to Draw a Hibiscus for Kids

Here’s a fun and easy guide to help you make your very own hibiscus drawing!
Step 1: Create the Heart of the Flower
Begin by drawing a tiny circle right in the middle of your paper. This circle will be the center of the hibiscus flower, where the stamen will be found.

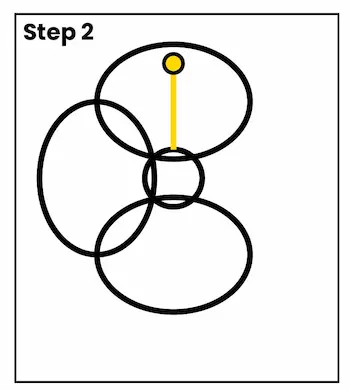
Step 2: Sprinkle on the Petals
Now, let’s create the lovely petals surrounding the center circle! Hibiscus petals are big and usually have a fun, wavy edge. Sketch 5-6 petals that are a bit stretched and bend outward. Ensure they are placed apart just right and blend a bit, giving a vibrant and rich look.
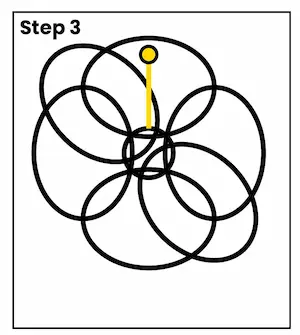
Step 3: Add Fun Details to the Petals
To make your petals look interesting, draw gentle lines that follow the shapes and outlines. These lines will show the natural patterns and shapes of the petals, giving them a more lifelike look.
Step 4: Make the Fun Shape
In the middle of the flower, include the stamen, which is usually a slender, elongated part that extends from the center. Draw a tiny line reaching up from the middle circle, and place little oval shapes at the tip for the anthers. You can also sprinkle little dots for pollen.
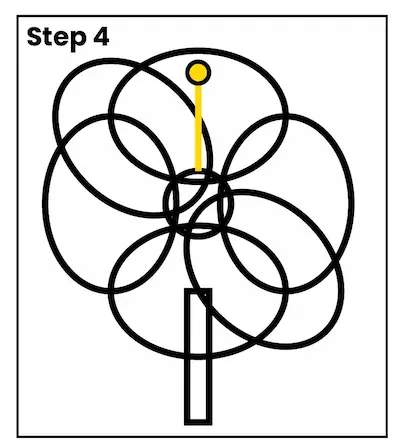
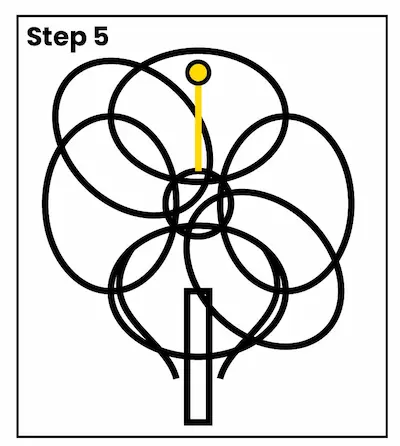
Step 5: Create the Stem
Under the flower, sketch a strong stem reaching downwards. Hibiscus stems are often sturdy, so make it a bit wider than your pencil line for a strong look.
Step 6: Add Foliage
On either side of the stem, draw a few hibiscus leaves. Hibiscus leaves are usually wide, featuring sharp tips and jagged edges. Sketch a few leaves at different angles, ensuring they are bigger near the base of the flower and gradually decrease in size as they ascend the stem.

Step 7: Add Color to Your Hibiscus
Now it’s time to bring your drawing to life with some vibrant colors! Choose vibrant reds, pinks, yellows, or oranges for the petals, mixing shades for added dimension. Try using deeper tones in the middle and softer hues around the edges for a fun and lively appearance. Select a lively green for the stems and leaves, incorporating shading to enhance the realistic look.
Step 8: Include Fun Background Elements (Optional)
To make your drawing even more fun, think about including some cheerful background elements like a bright sky, fluffy clouds, or playful tropical plants. You might think about adding some cheerful birds or fluttering butterflies to make your hibiscus flower scene even more vibrant and fun!
Take Inspiration
Here are some fun ideas to spark your imagination for drawing hibiscus flowers:
- Sunny Spots: Snapshots from sunny getaways or lush gardens can offer bright inspirations for hues and forms.
- Art Supplies: Explore fun art books or videos that showcase colorful plant drawings for cool techniques and styles that could spark your creativity.
- Photography: Discover pictures of hibiscus flowers online to admire their fun shapes and bright colors up close.
- Exploring the outdoors: A trip to nearby gardens or parks featuring hibiscus plants can inspire creativity and offer hands-on experiences.
FAQs: How to Draw a Hibiscus
Is drawing a hibiscus hard?
Creating hibiscus flowers can be easy and fun by following these steps. Little ones will discover that concentrating on simple shapes allows them to appreciate the flower’s beauty without becoming overwhelmed.
Which colors would be best for my hibiscus drawing?
Hibiscus flowers are super bright and full of color! Popular shades are bright reds, cheerful pinks, sunny yellows, and vibrant oranges. They can pick any colors they want, even mixing them to make something special.
What are some tips to enhance the realism of my hibiscus drawing?
To make things look more real, focus on the shading and texture! Apply deeper colors around the flower’s center and softer hues at the edges. Including fun details like lines on the petals can make it even more exciting!
Is it okay if I add more flowers to my drawing?
For sure! Hibiscus flowers can be wonderfully paired with other vibrant tropical blooms like plumerias or orchids, making for a delightful floral display.
What if my drawing doesn’t look like I imagined?
Encourage young ones to have fun with the art of drawing! Art is all about sharing your feelings, and each drawing tells its own special story. Oopsies can sometimes bring about surprising and imaginative outcomes.
Case Study: Hibiscus Art Workshop
A community center set up a fun hibiscus drawing workshop for young artists aged 7-12, where they could learn to draw and color beautiful hibiscus flowers. The session kicked off with a fun introduction to hibiscus flowers, highlighting their cool features and significance in various cultures.
Outcome:
- Engagement: The little ones were thrilled to draw, especially while discovering the bright colors of hibiscus flowers.
- Creative Growth: Participants enhanced their drawing abilities, concentrating on shapes, proportions, and color blending.
- Imaginative Fun: Every little artist crafted their own special hibiscus masterpiece, using their favorite colors and styles, which sparked a feeling of joy in what they created.
Conclusion
Drawing hibiscus flowers is a fun and imaginative activity for little ones. With their bright colors and fun shapes, hibiscus flowers spark creativity and adventure. This fun and simple guide helps little ones learn to draw a lovely flower, boosting their confidence in their creative skills along the way. So grab your supplies, let your creativity shine, and have fun exploring the delightful world of drawing hibiscus flowers!


