Creating a turnip illustration can be a wonderful opportunity for young ones to engage with creativity and the outdoors. Turnips are fun and quirky vegetables with cool shapes and colors, making them a great choice for a drawing project for little artists. In this guide, we’ll explore all the fun steps from collecting supplies to a straightforward, easy-to-follow process, plus some imaginative theme ideas to make your turnip drawing even more exciting! Let’s jump into the exciting world of turnips!
Table of Contents
Materials Needed
To kick off your fun drawing adventure of a turnip, grab these simple supplies that are easy to find:
- Paper: You can use all sorts of fun paper, like plain printer paper, sketch paper, or a drawing pad!
- A simple pencil with a nice eraser is super important. A pencil lets you draw softly, tweak your work, and quickly fix any mistakes.
- Colored Pencils, Crayons, or Markers: To create a fun turnip, you’ll want to use bright colors like purple, green, and brown. But go ahead and choose any colors you want to make your own special version!
- Black Marker or Pen (if you want): This can be used to trace around your drawing at the end, making the lines pop and giving the artwork a polished appearance.
Themes to Explore While Drawing a Turnip
Making your turnip drawing special with a fun theme is a fantastic idea that can add excitement and creativity! Here are some fun ideas to get your imagination going:
Garden Scene: Illustrate your turnip nestled in a vibrant garden setting, surrounded by rich soil, a variety of vegetables, and perhaps some friendly insects or blooming flowers nearby. This gives a fun, lively vibe and makes your turnip feel like it’s part of a playful adventure in a vibrant world.
Turnip Character: Looking to give your turnip a fun and lively vibe? Consider adding a cheerful expression, featuring large, bright eyes and a happy smile. You could add arms and legs to transform the turnip into a fun character, ideal for a lively animated or cartoon-style drawing.
Harvest Theme: Picture a joyful time for gathering the autumn bounty! Sketch a bunch of turnips nestled in a basket, or depict them just harvested and scattered across a sunny field. This theme brings a fun narrative to your drawing, making it even more exciting to look at!
Step-by-Step Guide: How to Draw a Turnip
Let’s jump into the step-by-step guide for an easy and enjoyable turnip drawing:
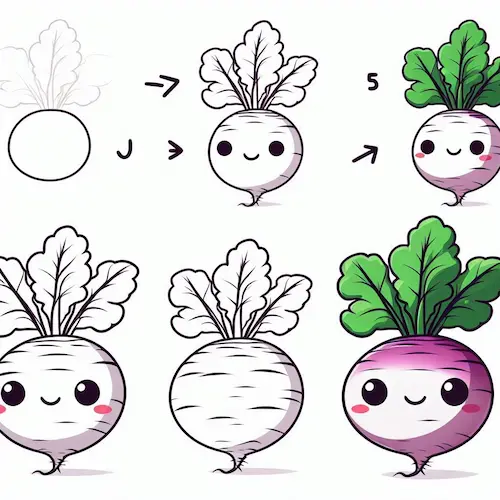
Step 1: Start with a Circle
Start by creating a round shape for the main part of the turnip. This should be a medium-sized circle right in the middle of your paper, creating the rounded root part of the turnip. For a natural look, don’t stress about making the circle perfect—a little bit of unevenness will bring out the charm.

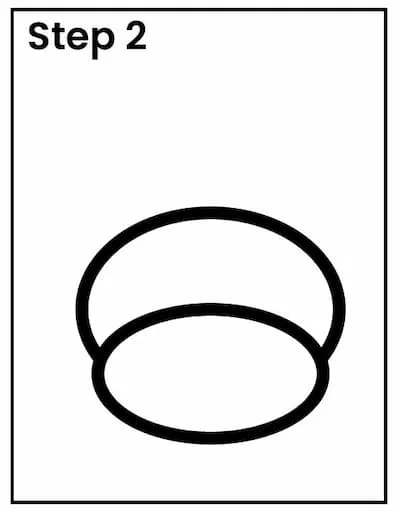
Step 2: Add the Turnip’s Bottom
At the bottom of your circle, create a little pointed shape that narrows down. This pointed area shows where the turnip connects to the roots in the ground. Ensure it’s soft and delicate, resembling the gentle curve of a teardrop, to truly reflect the shape of a turnip.
Step 3: Draw the Leaves
Next, add some big, wavy leaves popping out from the top of the turnip. These leaves should curve outward from the center, creating a playful look of vibrant, flowing greenery. Turnip leaves can be long and a bit jagged, so you can add some fun little waves or curls to each leaf!

Step 4: Add Details to the Leaves
To create lifelike leaves, start by sketching a line down the middle of each leaf to represent the main vein. Next, draw smaller lines that extend from the main line to form extra branches. This step makes your leaves pop and feel more alive, adding a fun touch to your drawing!

Step 5: Outline Your Drawing
Grab a black marker or pen and carefully trace over those pencil lines to really make your turnip drawing pop! This step is optional, but outlining your drawing will give it a fun, playful effect that helps highlight the details.

Step 6: Color Your Turnip
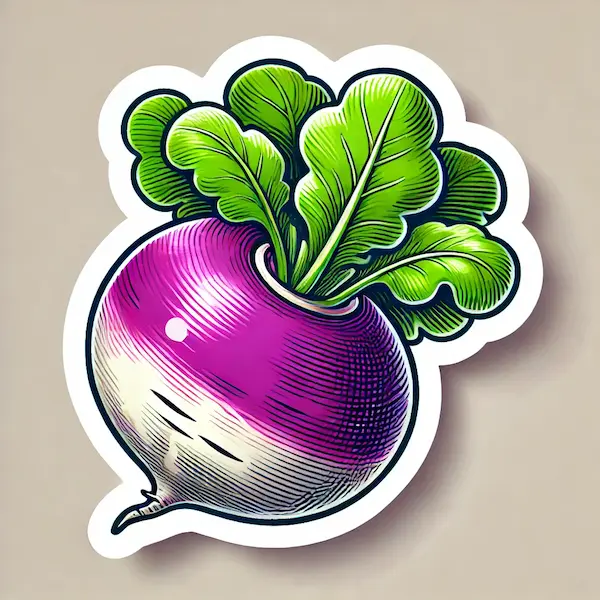
Now it’s time to make your turnip come alive with vibrant colors! Begin by adding a splash of purple to the upper section of the turnip’s root. As you go down, use white or light gray to illustrate the natural gradient in a turnip’s color. Choose a bright green for the leaves, and use a deeper green to create shadows that give them a lively and dynamic appearance.

Step 7: Draw the Soil (Optional)
If you want to make your turnip look like it’s sprouting from the earth, just add a little bit of brown shading around the bottom to show the soil. This brings a fun vibe and makes your turnip feel right at home in a lively setting.
And there you have it—a wonderfully illustrated, vibrant turnip!
Take Inspiration for Your Turnip Drawing
Looking for some fun and creative ideas to spark your imagination? Here are some fun ideas to help you make the drawing uniquely yours:
Check out real turnips! Seeing them at home or in a grocery store can be a fun way to discover their cool shapes, textures, and colors. Look at how the purple flows into white, and how the leaves are linked to the root.
Explore a Garden or Market: Spotting turnips alongside other veggies in a garden or at a market can spark your imagination for fun backgrounds and extra details to make your drawing pop!
FAQs
What are some ways to enhance the appearance of my turnip?
Adding shading can make your turnip drawing look super cool and pop out like it’s real! Have fun adding a bit of darker purple or green around the edges of the root and leaves to make them pop!
What if my turnip isn’t shaped just right?
No problem at all! Turnips can be found in all sorts of fun shapes, and their little quirks make them even more special! Celebrate all the special traits that make your turnip stand out!
Is it okay to use various colors?
Absolutely! Enjoy experimenting with all the colors you can imagine! Exciting options can bring your turnip to life and spark creativity.
Conclusion
Drawing a turnip is a delightful and easy activity for little ones to explore vegetables and enhance their drawing abilities. With just a few simple steps and some vibrant touches, little creators can make an adorable turnip that looks fantastic. By adding a face, trying out various backgrounds, or creating an entire garden scene, they can personalize each drawing in their own unique way.
Inspire your little creators to continue discovering their imagination and enjoy every moment of the journey. Have fun creating!

