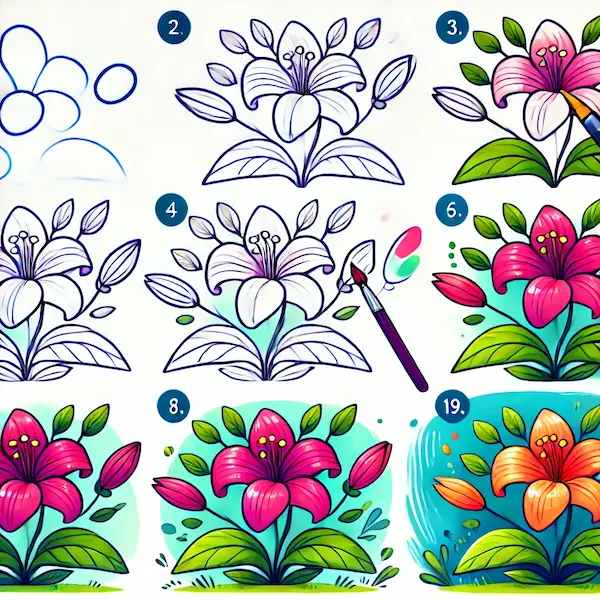
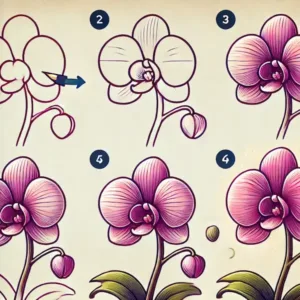
Drawing is a wonderful way for young ones to express their imagination, enhance their dexterity, and enjoy themselves while discovering new things. A lovely flower that’s fun and simple to sketch is the lily. With its beautiful petals and lovely shape, the lily is a fantastic subject for little creators. In this blog post, we’ll show you how to draw a lily in easy steps that are fun and engaging. This tutorial is crafted for young creators, featuring simple steps that will boost their confidence in drawing.
Table of Contents
Items Utilized
Before we jump into the fun, be sure to gather all the supplies you’ll need! Here’s a fun list of what you’ll need to create a lily:
Any kind of drawing paper is great, but a plain white sheet is best for making those outlines really pop!
Pencils: HB pencils are super fun for doodling and drawing! A pencil that’s a bit softer, like a 2B, is great for adding fun little details!
Always have an eraser close by to fix mistake or make your artwork even better!
Coloring Tools: You’ll need some fun colors for the finishing touches! Bright and cheerful flowers can be created in all sorts of colors, so let your creativity shine!
A black marker can be a fun addition! If you’d like to outline your drawing and make it pop, it’s a fantastic choice.
Ideas for Lily’s Artwork
You can explore a variety of fun methods to include a lily in your drawings! Some popular themes for young ones to explore are:
- Nature-inspired art: Create a vibrant scene featuring a meadow filled with lovely lilies in a stunning garden.
- Seasonal artwork: Incorporate lilies into vibrant spring or summer scenes.
- Fantasy designs: Young ones can add magical touches to their lilies, such as butterflies or sparkles, to make them feel more imaginative.
Guide by Guide Steps to Create a Beautiful Lily Drawing for Young Artists
Alright, let’s dive into the fun of drawing a lily flower! Here are some easy steps to guide young artists in creating a lovely lily effortlessly:

Step 1: Create the Heart of the Flower
Begin by sketching a tiny oval right in the center of your paper. This will be the heart of the lily flower, where all the colorful petals come together. You can also add little lines inside this oval to indicate where the flower’s stamen (the pollen-producing part) will be.

Step 2: Add the First Fun Layer
From the oval, create a fun, wavy petal that stretches out to the side and dips down a little. The petals of a lily are gentle and graceful, so the lines should be smooth and curvy, not too rigid or pointed. Ensure that the petal tapers to a point at the tip and is broader at the bottom close to the center.

Step 3: Complete the Remaining Petals
Now sprinkle in four or five more petals around the center oval. Every petal needs to be roughly the same size as the first, spreading out in various directions. Don’t forget to change up the angles of the petals to give the flower a more lifelike appearance! Some petals can cover others, making your drawing appear more lifelike.
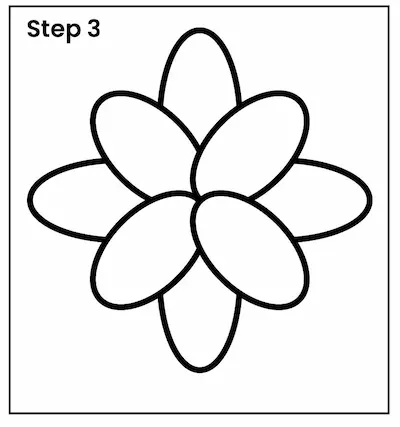
Step 4: Add Layers with Flowers in the Back
To create a fun and lively appearance, place a few petals behind the ones you just drew. These petals will be a bit smaller and will peek out from behind the ones in the front. This will make the lily look vibrant and full of life.

Step 5: Create the Stem
Next, draw the stem starting from the bottom of the flower’s center. The stem should be a straightforward long line extending down from the flower. Make it a bit curved to create a more natural appearance.
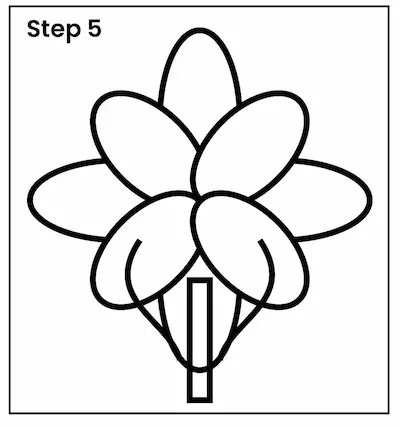
Step 6: Attach the Foliage to the Stem
Lily leaves are slender and elongated. Sketch some leaves sprouting from the stem, on each side. These should also curve a bit to follow the shape of the flower’s petals.

Step 7: Sprinkle Some Fun on the Petals
To make the flower more fun, add lines in the middle of each petal! These lines should follow the gentle curve of the petals, beginning at the base near the flower’s center and reaching outward.
Step 8: Add Some Color to Your Lily
Now that you’ve created your lily, it’s time to bring it to life with some vibrant colors! Flowers bloom in so many fun colors, like bright white, cheerful pink, sunny orange, and happy yellow! Pick your most loved colors and softly fill in the petals, ensuring to shade them lightly for a more lifelike appearance. Make sure to color the leaves and stem with a bright green shade! Using a black marker to outline the drawing can really help it pop and grab attention!
Step 9: Include Fun Background Elements (Optional)
If your little one wants to enhance their artwork, think about adding a garden or a few more lilies in the background. This will add context to the drawing and make it even more exciting to explore.
Find Your Spark
Little ones can find inspiration from the world around them when drawing lilies. Here are a few fun suggestions:
Nature Adventures: Go for a stroll in a local garden or park and check out the beautiful lilies in their natural setting. Look closely at the vibrant colors, fun shapes, and the way they develop over time.
Books and Illustrations: Explore images of lilies in storybooks or nature magazines to inspire your drawing.
Awesome Art: Check out the creations of well-known artists who have painted beautiful flowers, like Claude Monet. His painting “Water Lilies” is a fantastic example of incorporating flowers into art.
Pictures: Look for pictures of lilies online to inspire your drawing and showcase the flower’s lovely features.

FAQs: Steps to Create a Beautiful Lily Drawing
How can you quickly and easily sketch a lily?
The simplest way to create a lily is to begin with its center and then add its long, graceful petals around it. Simplifying the flower into basic shapes helps little ones to understand better.
Is it possible to sketch a lily without including extra details?
Absolutely! For little ones or those just starting out, you can simplify things by keeping the petals and stem straightforward. As you get better, you can include fun details like petal lines and more lifelike leaves.
Which colors are best for drawing a lily?
Flowers can be illustrated in a rainbow of colors, like white, pink, yellow, or orange. Little ones can let their creativity soar and pick any color they fancy.
What are some fun ways to make my lily drawing look more lifelike?
To make your drawing look super cool, try adding fun details like shadows and lines on the petals! Also, use bright colors and fun patterns when coloring to make the flower pop and look more lively!
Can we use markers instead of pencils?
Absolutely, you can use markers to create beautiful lilies. However, using pencils is super fun for adding shadows and fixing little mistakes, so it’s usually a good idea to begin with pencils and then trace over with markers if you want to!
Case Study: A Fun Lily Drawing Activity
In a classroom setting, a group of ten little ones aged 7-9 was given a fun lily-drawing task following the above instructions. The session kicked off with a fun introduction to the flower, and everyone received some cool materials to get started. They followed the step-by-step process, and at the end of the activity, everyone had successfully drawn their own versions of a lily.
Result:
Creative Confidence: The little ones had a blast with the process and beamed with pride over their drawings. Lots of little ones tried out various colors and patterns, showcasing their imagination.
Enhanced Attention: By adhering to the guidelines closely, young learners developed a keen eye for details and processes, boosting their capacity to stay engaged with a task.
Positive Feedback: The little ones shared that sketching the lily was simpler than they first imagined, and several expressed interest in learning to draw more flowers down the line.
Conclusion
Learning how to draw a lily is a delightful and enriching activity for young ones. It opens up a world of wonder and imagination, fostering growth and exploration. By following this step-by-step guide, little ones can create a beautiful lily drawing that they can be proud of. Whether you’re a caregiver or educator, this activity will not only inspire a love for art but also enhance young ones’ drawing skills. So, collect your supplies, stick to the steps, and have a blast creating a beautiful lily!

