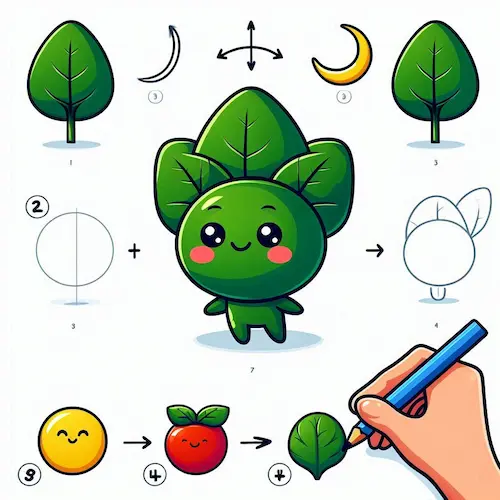
Spinach, with its vibrant greens and unique heart-shaped leaves, is a delightful and engaging topic to illustrate. Sketching leafy greens is a fun way to explore making organic forms and incorporating different textures. In this guide, young artists will discover how to draw spinach leaves, whether as part of a plant or as a bunch. By following these simple steps, little creators can capture the beauty of this nutritious vegetable.
Table of Contents
Supplies Utilized
Before we start our fun drawing of spinach, here’s a list of supplies you’ll need:
Art supplies: Any drawing paper or sketchbook.
Crayon: To color the leaves.
Rubber: To fix any oopsies.
Brightly colored pencils or crayons: Use green for the spinach and brown for the stems if necessary.
Black Marker (optional): To outline the artwork and make it pop.
Ideas for Spinach Artwork
Explore various themes when illustrating spinach to add a fun twist to your artwork:
Draw some leafy greens sprouting from the earth, surrounded by rich soil and other cheerful plants.
Draw a big, bright bowl filled with vibrant, leafy greens, perfect for a tasty salad or a yummy dish!
Cartoon Spinach: Give your spinach leaves playful faces or expressions, turning them into adorable characters from the greens.
Spinach on a Plate: Create a colorful drawing of a plate brimming with spinach, maybe accompanied by some other fun veggies, to make it a delightful food-themed artwork.
Step-by-Step Instructions on How to Draw Spinach
Let’s dive into drawing spinach leaves one step at a time! Just follow these fun steps, and before you know it, you’ll have a lovely spinach plant sketched out on your paper!

Step 1: Create the Shape of a Spinach Leaf
Begin by sketching the simple outline of the spinach leaf. Start by sketching a gentle heart shape, as spinach leaves often resemble this form. Make the bottom point of the heart soft and rounded, just like how the edges of spinach leaves are nice and smooth.

Step 2: Include the Central Leaf Line
Make a fun line right down the center of the spinach leaf, starting from the top and going all the way to the bottom! This is the leaf’s midrib, the main vein that provides the leaf with its shape and support. Make this line a bit wavy to match the fun shape of the leaf.

Step 3: Add More Veins
Now, add little veins spreading out from the main vein. The veins are meant to gently arch outwards towards the leaf’s edges. The veins can be a bit wiggly and fun, just like how real spinach leaves have their own unique and playful designs!

Step 4: Create Additional Spinach Leaves
To make the picture more fun, sprinkle in some extra leaves! You can sketch them from various angles to make a whole lot of spinach. Some leaves can be big and some can be small, just like they would be when they grow together on a plant, overlapping in a fun way.

Step 5: Create the Spinach Stem
At the bottom of each leaf, add a little, curved stem that links the leaf to the plant. The stem can be a little skinnier than the leaf and can bend in any way it wants. If you’re illustrating spinach sprouting from the earth, let the stems reach down into the dirt.

Step 6: Sprinkle in Some Fun and Flair
To make the spinach look more fun, add little curves or slightly wavy lines along the edges of the leaves. Spinach leaves have natural wrinkles, so including these details will make your drawing look more vibrant and fun. You can also color one side of the leaf to show where the light shines and make it look more interesting.
Step 7: Add Some Color to the Spinach
Now that the outline is done, it’s time to color the spinach! Try using a variety of green colors to color in the leaves. Begin with a cheerful light green for the base, then sprinkle in a deeper green to highlight the veins and edges of the leaves. The stem can be painted a soft green or a gentle brown.
Step 8: Sprinkle in Some Bright Spots and Dark Areas
To make the spinach leaves stand out, add some bright spots and darker areas. Leave tiny white spots or use a softer green on one side of each leaf to show where the light is shining. Shade the opposite side with a richer green for shadows, creating a more lively and playful appearance for the leaves.
Step 9: Make a Fun Background (Optional)
For some extra fun, create a background! Your spinach might be sprouting in a garden, resting in a basket, or hanging out on a kitchen counter. Including background elements brings your drawing to life and adds a sense of story.
Find Your Spark
Here are some fun ideas to spark your creativity for drawing spinach:
Explore a Garden: If possible, check out a community or home garden to see how spinach and other leafy greens thrive. Seeing real plants can help you understand their shapes and textures better.
Check out the fun pictures of how spinach is used in yummy dishes like salads or smoothies! This can spark your imagination for sketching leafy greens in a bowl or on a plate.
Outdoor Adventure: Step outside and explore the various leaves on different plants. Spinach may not be growing nearby, but you can find other leaves with similar shapes to practice your drawing skills.
Animated Delights: Lots of animated shows showcase vegetables as characters, sparking creative inspiration for drawing spinach in a lively, whimsical way.
FAQs: How to draw Spinach
How to Draw Spinach 1. Is drawing this leafy green tricky?
Absolutely, drawing spinach is a piece of cake! The leaves have a fun heart shape, and with just a few easy lines for veins and stems, you can whip up a cool spinach drawing super quickly!
What colors are best for spinach?
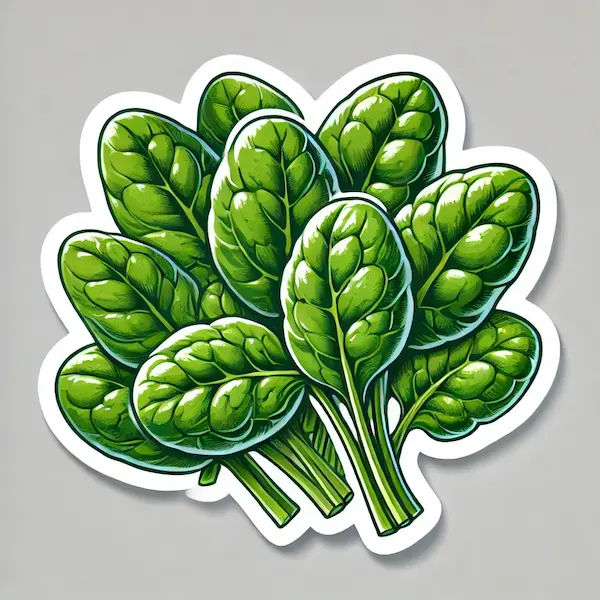
Spinach is usually green, so try using various shades of green to color the leaves. Feel free to play around with deeper shades of green for adding some shadow and brighter greens for those fun highlights!
What are some ways to enhance the realism of my spinach drawing?
To make your spinach leaves look super cool, pay attention to shading and add fun little details like leaf veins and texture! Additionally, adding gentle wrinkles or curves along the edges will create a more lifelike look for your spinach.
Is it possible to draw spinach alongside other veggies?
Absolutely! Creating pictures of spinach alongside other veggies can add a fun twist to your art! You could create a colorful garden picture featuring leafy greens, juicy red fruits, and crunchy orange roots, or arrange some leafy greens in a bowl alongside a variety of colorful fruits and vegetables.
What can I do if my spinach leaves aren’t looking their best?
That’s perfectly fine! Creating art is all about having fun and exploring your imagination. If your leaves don’t turn out just right, you can always give it another shot or tweak them to match your special flair. The leaves of spinach in the wild have their own unique shapes, so your artwork will turn out wonderfully no matter what!
Case Study: Fun with Spinach Drawing
In an after-school art class, young learners were guided on how to draw various kinds of plants, with spinach being one of the primary focuses. The teacher led them through the fun steps, highlighting how cool shapes and textures can be when drawing the leaves.
Result:
Heightened Awareness of Details: Young learners became more observant of natural shapes and patterns, enabling them to depict the veins and edges of spinach leaves with greater precision.
Boosted Imagination: A few learners included playful touches, like silly faces on their spinach leaves or extra veggies to finish the picture.
Enhanced Shading Abilities: Through practicing shading and highlights, learners discovered how to add depth and dimension to their artwork.
Conclusion
Drawing spinach is a fun and simple activity that allows young ones to explore basic drawing skills while discovering more about leafy greens. With its cute heart-shaped leaves and fun texture, spinach is a perfect choice for those just starting out. By following this step-by-step guide, young artists can create their own spinach drawings, whether it’s part of a garden, a bowl, or a fun, imaginative scene. So grab your crayons, and let’s begin creating some leafy spinach art!

